
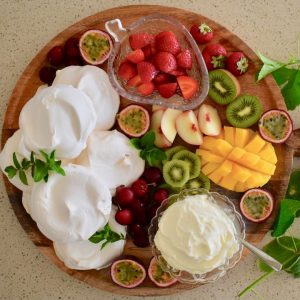
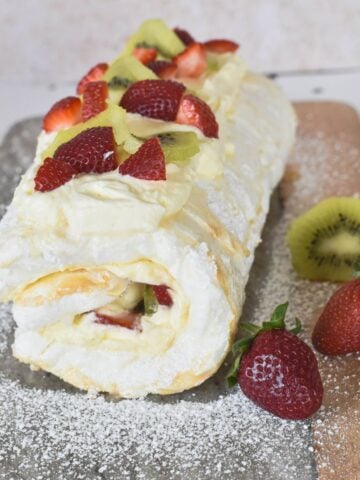
A Pavlova Grazing Board is always a hit! The dessert looks stunning and your guests can build their very own pavlova creation – just to their liking.
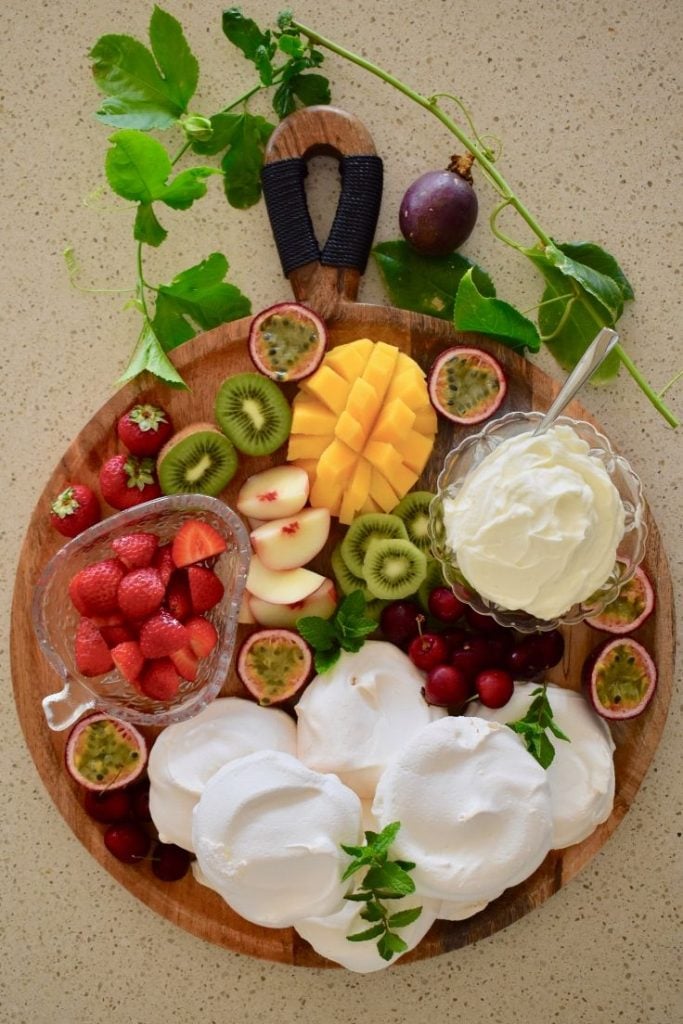
This dessert is extremely versatile and you can unleash your creativity to prepare a dessert that has that WOW factor. I've included the recipe for making the mini pavlova shells from scratch, however you could also easily use store-bought shells to create a memorable pavlova grazing board.
Jump to:
Who came up with this brilliant idea?
Over Christmas 2019, Shalini Nestor of Swish Biscuits shared her pavlova grazing board creation. Pavlova lovers went a little crazy for this idea, and her post quickly went viral.
Although I'm a big fan of the traditional pavlova, there are many things to love about this modern version of the traditional dessert.
Ingredient notes
To make this dessert, you'll need:
- 8 pavlova shells
- thickened cream and a little icing sugar
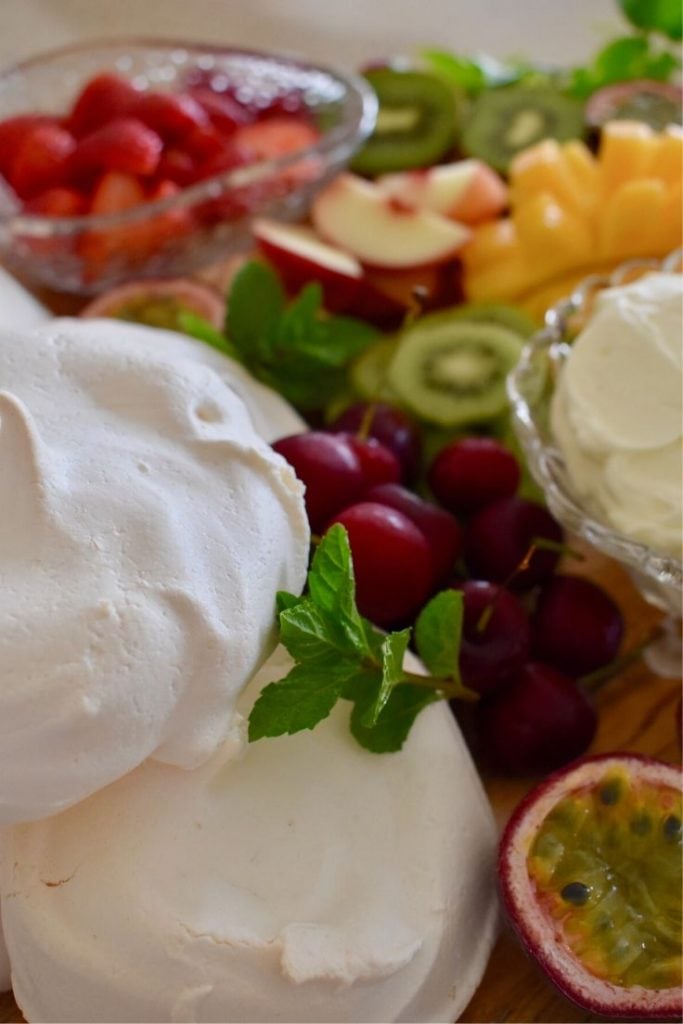
- fruit (I've used mango, passionfruit, strawberries, peach, kiwifruit and cherries)
- garnish (I've used mint)
- a serving board, small serving bowls and spoons.
To make pavlova shells from scratch, you'll need:
- egg whites
- salt
- caster sugar
- vanilla essence
- white vinegar.
All ingredient quantities are in the recipe card at the end of this post – keep scrolling!
How to make pavlova shells for your grazing board
TIP: Like when making a traditional pavlova, you should make the pavlova shells for your grazing board the day before and then store it/them in the oven or an airtight container. The grazing board can then be made up just before serving.
While you could buy store-bought pavlova shells, it really is quite simple to make your own. Here's how.
Start by preheating your oven to 120 degrees celsius (fan-forced) and lining a few baking trays with baking paper.
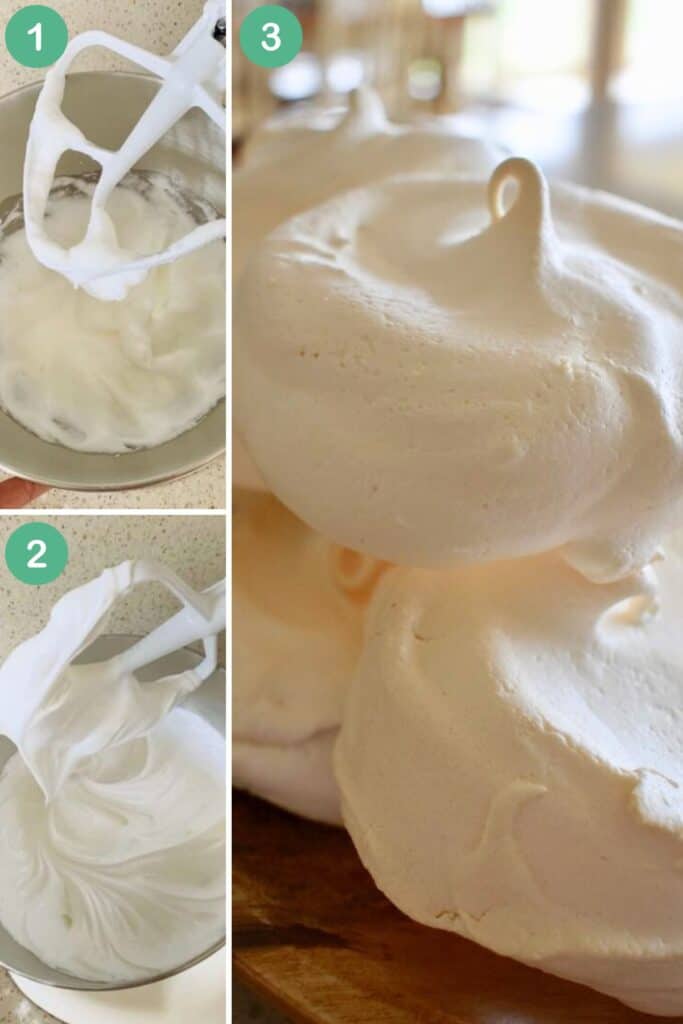
Beat the egg whites and salt on medium-high speed until the mixture forms soft peaks (see image 1). Add the sugar gradually while mixing on low speed. Then return to med-high speed and beat for another three minutes. The mixture should look thick and glossy (see image 2) – if it doesn't continue beating for another minute.
Return to low speed and add the vanilla essence and vinegar to the mixture. Mix until combined.
Spoon the mixture onto trays to create 8 separate mini pavlova shells. Flatten and shape each shell slightly so you have circles of about 8-10cm in diameter.
Turn oven down to 100 degrees celsius (fan-forced) and place trays in oven. Cook for 40 minutes and then turn oven off. DO NOT open the oven door. Leave the pavlovas to cool in the oven for at least a few hours, preferably half a day.
Once completely cool, remove from the oven (see image 3).
How to assemble the pavlova grazing board
Make up the whipped cream by simply combining the cream and icing sugar –beat until peaks form. Place in one of the small bowls.
Cut the fruit to your liking (and substitute other fruits if you prefer banana, figs, blueberries or something else) and place chopped strawberries in the other small bowl.
Place the pavlova shells, fruit and mint on the tray or board, using a little creativity to make your pavlova grazing board truly special.
Serving and storage
You can store the pavlova shells in an airtight container for up to one week. Once you've made the grazing board with the cream and chopped fruit, serve immediately.
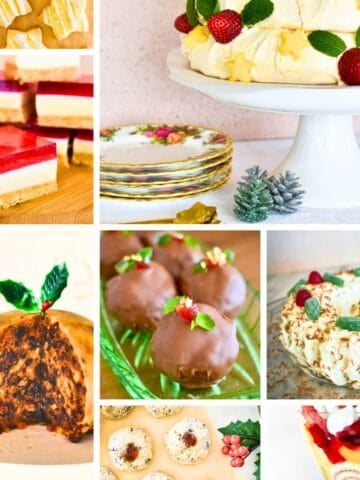
More perfect party food
Here are some more ideas for your next gathering:

Made this recipe and love it? Please take a moment to rate the recipe and leave a comment below. It’s such a help to others who want to try the recipe. (And it really makes my day to hear how Nana Ling's recipes are being made, shared and loved all around the world! - Libby x)
For more fun and deliciousness in the kitchen, follow along on Facebook, TikTok and Pinterest, and subscribe for new posts via email.
Pavlova Grazing Board
Equipment
- Large tray or board
- Two small glass bowls
- A few serving spoons
Ingredients
Pavlova
- 4 egg whites
- 1 pinch salt
- 1 cup caster sugar
- 1 teaspoon vanilla essence
- 1 teaspoon white vinegar
Whipped cream
- 600 ml thickened cream
- 1 tablespoon icing sugar
Fruit
- ½ mango
- 3 passionfruit
- 1 punnet strawberries
- 1 peach
- 2 kiwifruit
- 10 cherries
- 3 sprigs fresh mint
Instructions
- Preheat oven to 120 degrees celsius (fan-forced)
- Line a few baking trays with baking paper.
- Beat egg whites and salt on medium-high speed until the mixture forms soft peaks.
- Add sugar gradually while mixing on low speed. Then return to med-high speed and beat for another three minutes. The mixture should look thick and glossy - if it doesn't continue beating for another minute.
- Return to low speed and add vanilla essence and vinegar to the mixture. Mix until combined.
- Spoon mixture onto trays to create 8 separate mini pavlova shells. Flatten and shape each shell slightly so you have circles of about 8-10cm in diameter.
- Turn oven down to 100 degrees celsius (fan-forced) and place trays in oven. Cook for 40 minutes and then turn oven off. DO NOT open the oven door. Leave the pavlovas to cool in the oven for at least a few hours, preferably half a day.
- Once completely cool, remove from the oven.
- To make the whipped cream, simply combine the cream and icing sugar and the beat until peaks form. Place in one of the small bowls.
- Cut fruit to your liking (and substitute other fruits if you prefer banana, figs, blueberries or something else) and place chopped strawberries in the other small bowl.
- Place pavlova shells, fruit and mint on the tray or board, using a little creativity to make your pavlova grazing board truly special.
Maree McGinniss
This is the same as my family recipe. Love it!
Libby
Wonderful, Maree! I love this recipe. Once I discovered it, it became my new go-to pavlova recipe.