
They've been popular for decades and can still be bought at many bakeries. But you won't want to buy them once you've made them using this old fashioned Cream Horns Recipe.
Jump to:
What are Cream Horns (and why do we love them)?
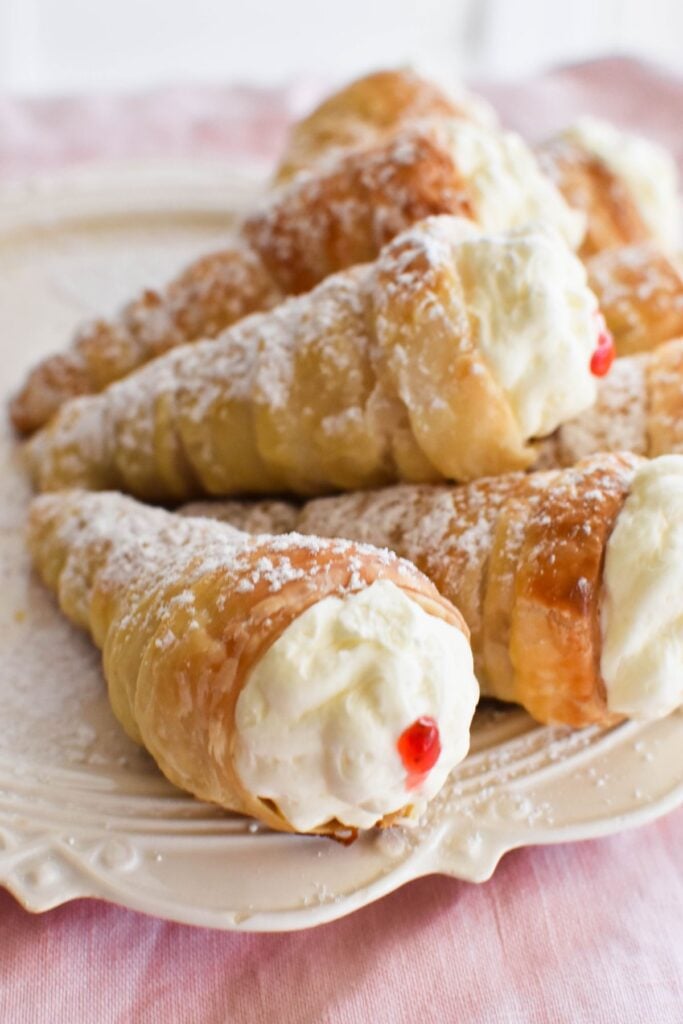
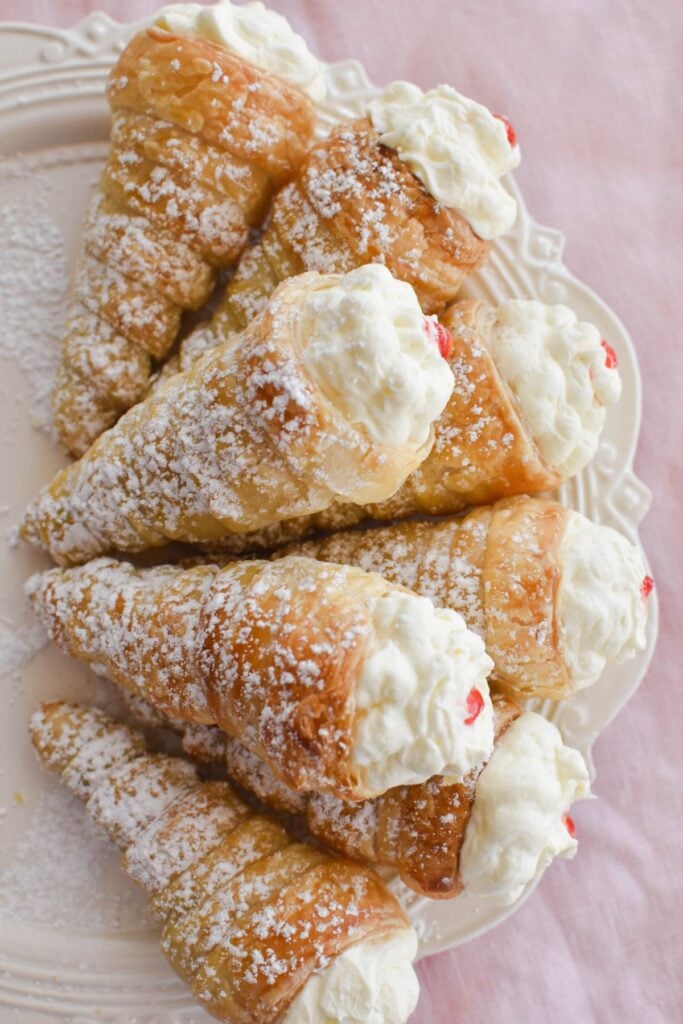
Cream Horns are just that perfect combination of flaky puff pastry, cream, sometimes a little jam, and often a dusting of icing sugar. They're also easy to pick up and devour!
They're thought to have originated in Eastern Europe.
Being so delicious, they made their way to many corners of the globe.
Today, cream horns (or something very similar) are called cannoncini in Italy, kornedákia in Greece, Schaumrollen in Austria and Lady Locks in Pennsylvania.
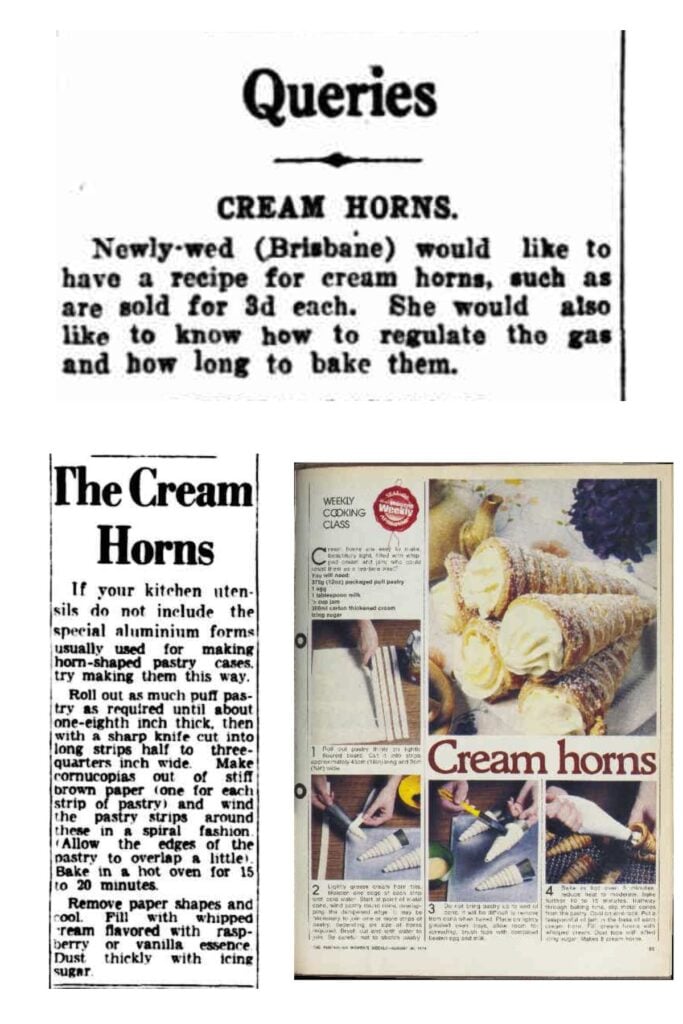
In Australia, recipes and descriptions of this much-loved pastry start appearing in newspapers from the early 1900s.
In 1929 a "newlywed" of Brisbane writes to Brisbane's Sunday Mail, requesting instructions for making "cream horns, such as are sold for 3d each." Sounds like she may have been looking to impress the new husband with her baking skills!
In the late 1970s, home cooks were still keen to impress with this treat – a full page recipe appears in the Women's Weekly in 1978.
The recipe
So there isn't a whole lot of room for variation when it comes to Cream Horns Recipes.
I've based mine on recipes from the mid to late 1900's – and focused on spelling out the method well. This is one of those recipes that really is all about perfecting the method.
Equipment and ingredient notes
To make Cream Horns you do need the special moulds or tins.
They are stainless steel and cone-shaped, and available at kitchenware shops, some "$2" shops, and online stores.
TIP: As a substitute, you could use mini ice cream cones wrapped in foil or take the advice in the newspaper clipping above.
Cream Horn Moulds are relatively affordable and will be easier to work with – so invest in a set if you can.
You'll also need a baking tray, a ruler (to measure the width of your pastry strips) and a sharp knife.
Ingredients include:
- 2 store-bought frozen puff pastry sheets (333 grams)
- 1 egg
- water.

Once you've made your horns, you have a few options on how to fill them.
These include:
- piping a little jam into the pointy end
- mock cream
- fresh cream
- icing sugar for dusting.
Yes, you'll need some piping bags and nozzles, plus a small strainer or sifter to dust with icing sugar.
These options and ingredient quantities can all be found in the recipe card at the bottom of this post.
First, though, let's step through how to make cream horns. I've included plenty of pictures to help you get confident about making cream horns.
How to make Cream Horns with puff pastry
Prepping
Start by removing the pastry sheets from the freezer and allowing to thaw.
Pre-heat the oven to moderate (180 degrees celsius / 360 degrees fahrenheit, fan-forced).
Grease a baking tray and the 8 cream horn moulds.
Making the pastry horns
Cut both the pastry sheets into 2cm wide strips using a sharp knife.
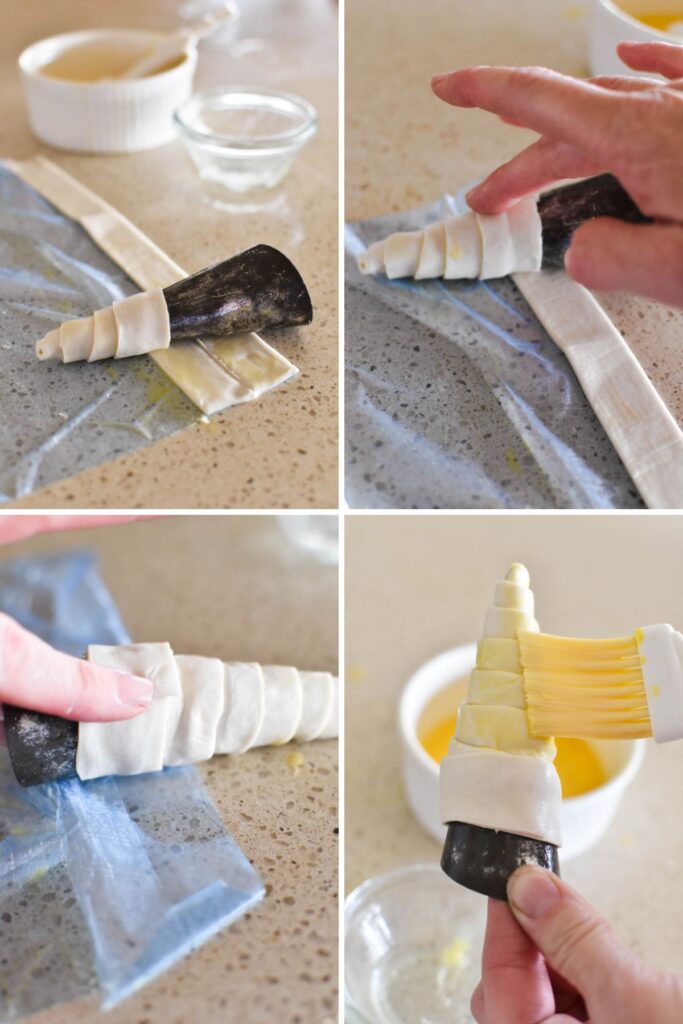
Using a pastry brush and some cold water, moisten the long edge of a pastry strip.
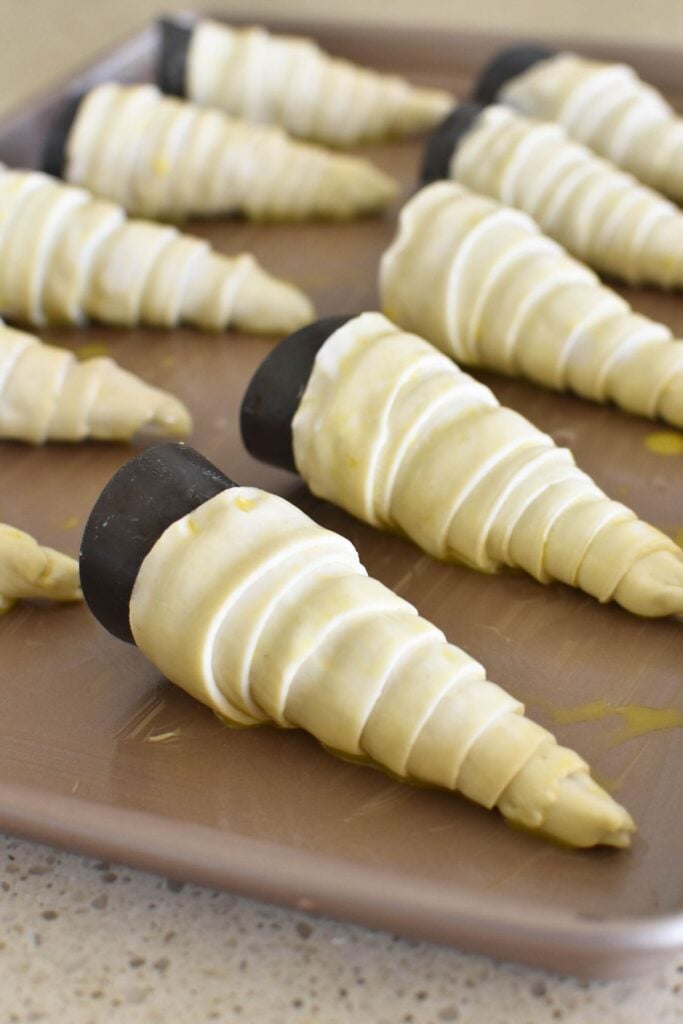
Starting at the point of the cone, gently wind the pastry strip around the cone (taking care not to stretch or damage the pastry and overlapping the strip with the previous layer). The moistened edge should help hold the overlapping parts of the pastry together.
You'll need about two strips for each horn, so join the end of one strip to the start of another with a little water and keep winding.
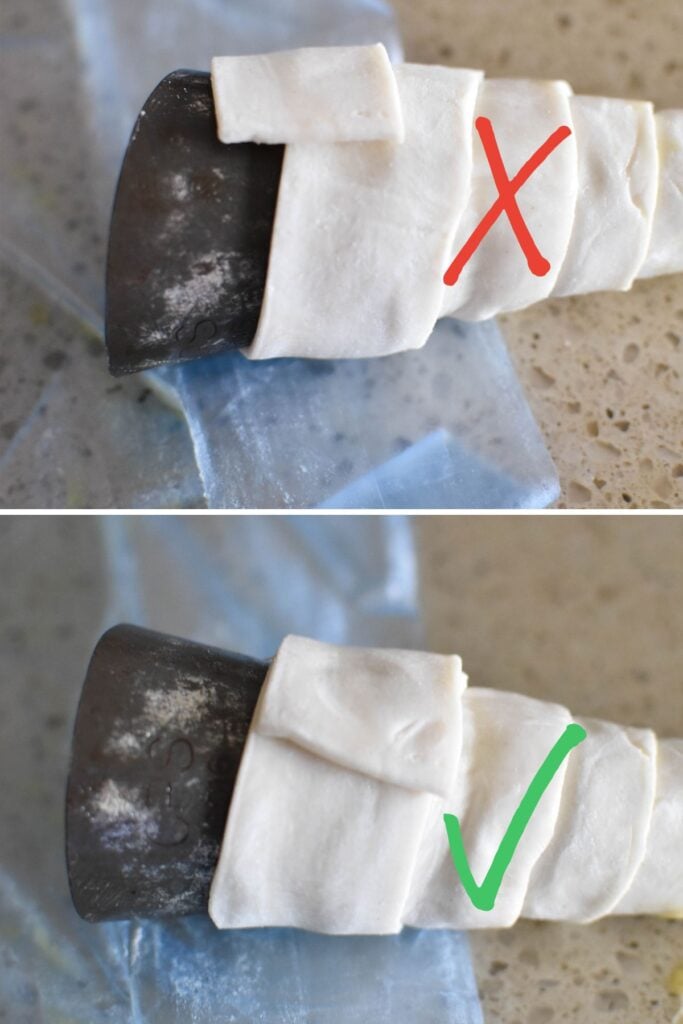
You should finish at least ½cm before the end of the mould (otherwise they will be hard to remove once cooked).
Keep repeating until you have eight.
TIP: When finishing off the last pastry strip, wind the pastry so that it meets with the previous layer, forming a circle at the top of the horn rather than seeing the short edge of the strip.
Baking the pastry horns
Before baking, you should brush the horns in an egg wash.
Whisk one egg with a teaspoon of water and brush each pastry lightly and evenly with the egg wash.
Place horns at least 2 cm apart on the greased baking tray.
Make sure you place the pastry join side down on the baking sheet.
Bake for 20 minutes and remove from oven.
Allow to cool a little (about 5 minutes) so that you can remove the horns from the moulds.
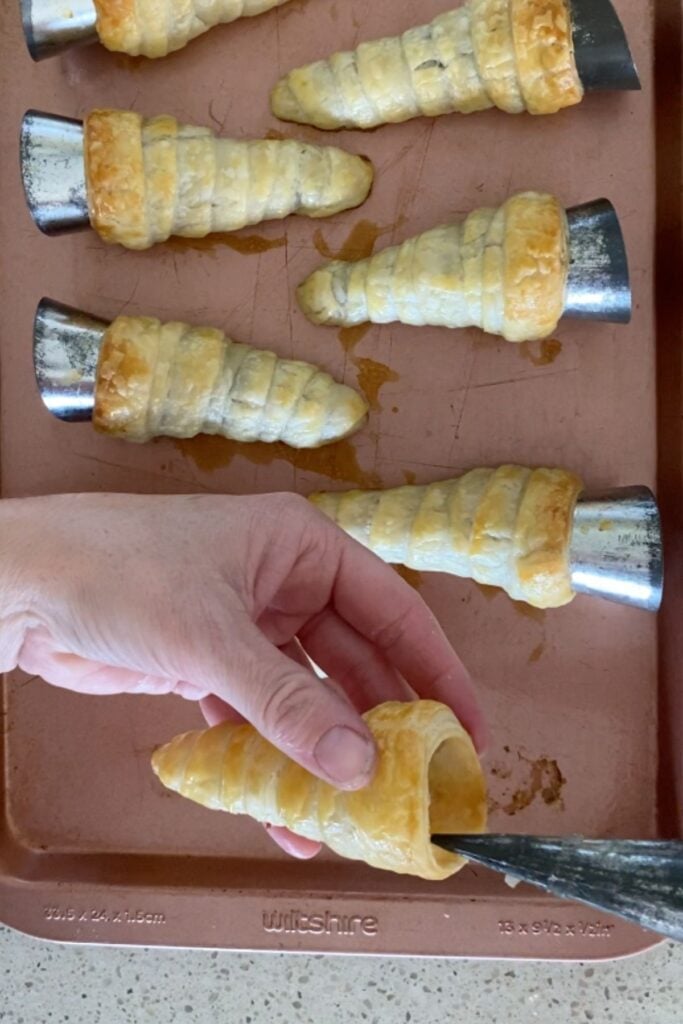
Place all of the horns back on baking tray and bake for another 5-10 minutes or until a golden colour.
Allow to cool completely on a wire rack before filling or storing.
Filling and Serving
Pastry horns can be stored in an airtight container for up to a day before serving and are best filled just before serving.
Jam or no jam?
If desired, using a piping bag and small round nozzle to pipe a little jam into the pointy end of each horn.
You can also add a small dot of jam on top of the cream once you've filled the horns.
Alternatively – especially if you have runny jam – place a tiny piece of strawberry on the top of each horn.
Fill with cream
TIP: Ingredients and instructions for making fluffy mock cream or fresh cream can be found in the recipe card at the bottom of this post.
Using a piping bag with a larger star nozzle, pipe your chosen cream into each horn, filling with enough cream so that the horns look a little like an ice cream.
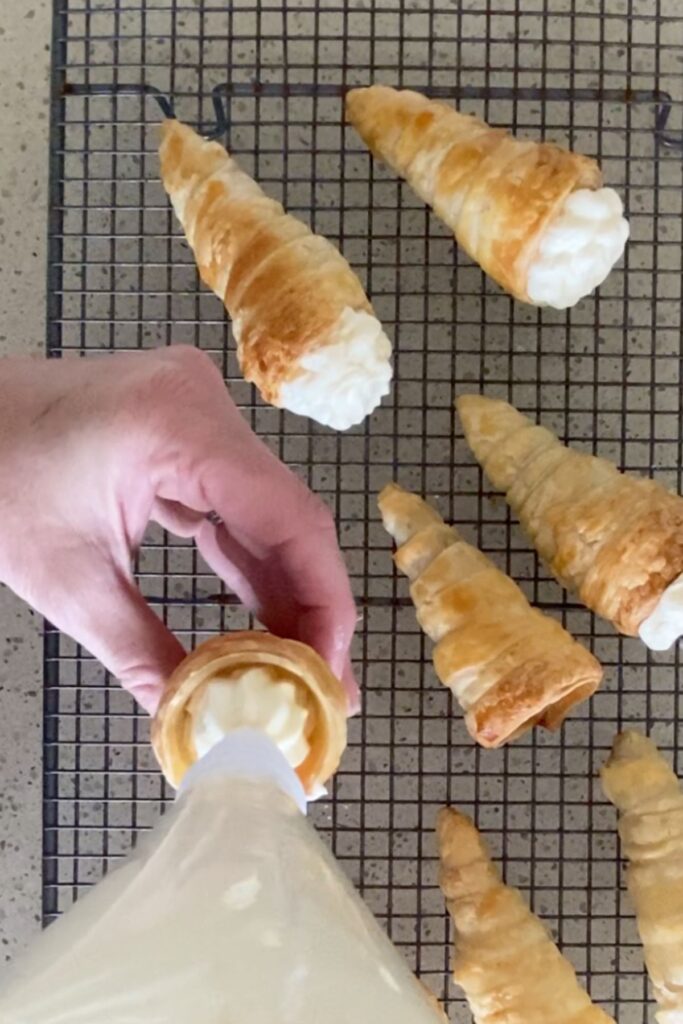
Place in the fridge until ready to serve. The less time in the fridge, the better.
Dust with icing sugar before serving. Use a small sieve or sifter to handle this job.
Variation ideas
The traditional simplicity of these is what makes them wonderful, however you could try:
- adding some cocoa powder to the cream and a little chocolate instead of jam for chocolate cream horns
- filling with custard or buttercream instead of fresh or mock cream
- making my Easter Carrot Cream Horns or using this to inspire your own creative take on traditional cream horns.
Recipe FAQs
You can make a day or two ahead and store in an airtight container (though they are better made fresh). If you want to make them weeks ahead, store in the freezer in an airtight container.
They really are best when filled just before serving.
However, you can fill and keep in the fridge for up to a few hours before serving.
You can freeze unfilled horns for up to a couple of months. You can also freeze them if they are filled with mock cream for a couple of months. I do not, however, recommend freezing if you've filled with fresh cream.
Mini ice cream cones wrapped in foil might work. However, I do recommend using the moulds for best results – they are widely available and I sometimes see them at op shops.
More old school bakery recipes
Indulge in more sweet nostalgia with these recipes:
Made this recipe and love it? Please take a moment to rate the recipe and leave a comment below. It’s such a help to others who want to try the recipe. (And it really makes my day to hear how Nana Ling's recipes are being made, shared and loved all around the world! - Libby x)
For more fun and deliciousness in the kitchen, follow along on Facebook, TikTok and Pinterest, and subscribe for new posts via email.

Cream Horns Recipe
Equipment
- 8 cream horn moulds (about 11cm long) (can be purchased from specialty kitchenware stores or online - just Google "cream horn moulds" to find available online stores in your location)
- piping bags and nozzles (nozzles and disposable bags can be purchased from specialty kitchenware stores or online, and even some department stores and supermarkets)
Ingredients
Pastry Horns
- 2 store-bought frozen puff pastry sheets (333 grams)
- 1 egg
- water
Jam
- 2 tablespoons strawberry or raspberry jam
Fluffy Mock Cream
- 125 grams butter
- 1 tablespoon hot milk (heat for 20 seconds in microwave)
- 1 ¾ cup icing sugar (215 grams)
- ½ teaspoon gelatine
- 3 tablespoon boiling water
- ½ teaspoon vanilla extract
Fresh Cream
- 300 ml thickened cream (heavy cream)
- 2 tablespoons icing sugar (confectioners sugar)
Decorating
- 2 tablespoons icing sugar (confectioners sugar)
Instructions
Pastry Horns
- Pre-heat oven to moderate (180 degrees celsius/360 degrees fahrenheit, fan-forced).
- Allow pastry sheets to thaw.
- Grease a baking tray and the 8 cream horn moulds.
- Cut pastry into 2cm wide strips using a sharp knife.
- Using a pastry brush and some cold water, moisten the long edge of the pastry strip. Starting at the point of the cone, gently wind the pastry strip around the cone (taking care not to stretch or damage the pastry and overlapping the strip with the previous layer). The moistened edge should help hold the overlapping parts of the pastry together.
- You'll need about two strips for each horn, so join the end of one strip to the start of another with a little water and keep winding. You should finish at least ½cm before the end of the mould (otherwise they will be hard to remove once cooked). When finishing off the last pastry strip, wind the pastry so that it meets with the previous layer, forming a circle at the top of the horn rather than seeing the short edge of the strip.
- Whisk egg with a teaspoon of water and brush the pastry lightly and evenly with the egg wash.
- Place horns at least 4 cm apart on the greased baking tray. Make sure you place the pastry join side down on the baking sheet.
- Bake for 20 minutes and remove from oven. Allow to cool a little (about 5 minutes) so that you can remove the horns from the moulds. Place back on baking tray and bake for another 5-10 minutes or until a golden colour.
- Allow to cool completely on a wire rack before filling or storing.
Fluffy Mock Cream
- Place butter, milk and icing sugar into the bowl of a stand mixer and gradually increase speed from low to high. Beat on high for 5 minutes or until light and fluffy.
- Dissolve gelatine in water. Lower speed on stand mixer to low-medium and gradually add the gelatine mixture. Scrape down the sides of the bowl if necessary. Increase speed to high and beat on high for another 5 minutes or until light and fluffy.
- Add vanilla extract and beat to combine.
Fresh Cream
- Beat cream and icing sugar together for a few minutes or until cream holds together when you lift the beaters.
Preparing the Cream Horns
- Pastry horns can be stored in an airtight container for up to a day before serving and are best filled just before serving.
- If desired, using a piping bag and small round nozzle to pipe a little jam into the pointy end of each horn.
- Using a piping bag with a larger star nozzle, pipe the cream into each horn, filling with enough cream so that the horns look a little like an ice cream.
- Pipe a tiny amount of jam on top of the cream. (Alternatively – especially if you have runny jam – place a tiny piece of strawberry on top of each horn.)
- Place in the fridge until ready to serve. (The less time in the fridge, the better)
- Dust with icing sugar before serving.
Katrina Bowden says
These are so yummy they were a hit with the family 🤤🤤
Libby Hakim says
Such a classic treat, I always forget how GOOD these are - thanks for the reminder, Katrina! Happy cooking x
Lyn says
These have always been a huge family favourite of ours. Recently I hosted a high tea and to make them look extra special I added fresh raspberries to the open end. Delicious
Libby Hakim says
They are special! I love high teas and love your idea of adding a fresh raspberry - I'm sure they disappeared quickly 🙂