Hop to it and prepare this tasty Easter Grazing Board! Whether you're hosting a family gathering or simply want to treat yourself and your closest loved ones to a leisurely Easter spread, a grazing board is the perfect way to enjoy Easter time.
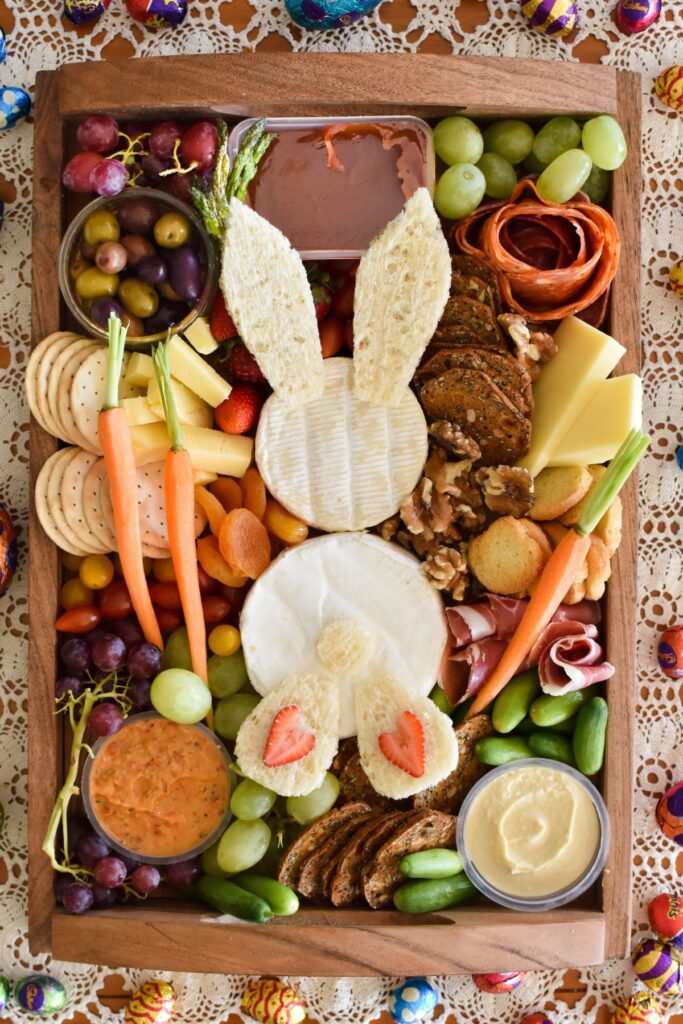
How to prepare an Easter Grazing Board
Grazing boxes and boards have been popular for years. No wonder – they're a feast for the eyes and the tastebuds.
They can also be prepared in advance, and guests can choose what they want to eat and when.
It really is a win win option.
While you can buy a grazing box – even the supermarkets sell them now – it's so easy to make one up yourself. And cheaper, too.
Going DIY also means you can choose exactly what you want to include and have some fun getting creative as you make up your own feast.
But how do you make it look amazing?
Tips for a truly egg-cellent Easter feast
If you want to make a grazing board exactly as I've done here, I've included all the bits and pieces along with instructions in the recipe card at the bottom of this post.
However, if you keep the following 7 tips in mind, you will have everything you need to create and enjoy a beautiful and delicious board of your own that will suit your occasion and own tastes perfectly.
1. Have a theme
Here, the theme is obviously Easter.
I've embraced the theme with cheese rounds that form the shape of a bunny.
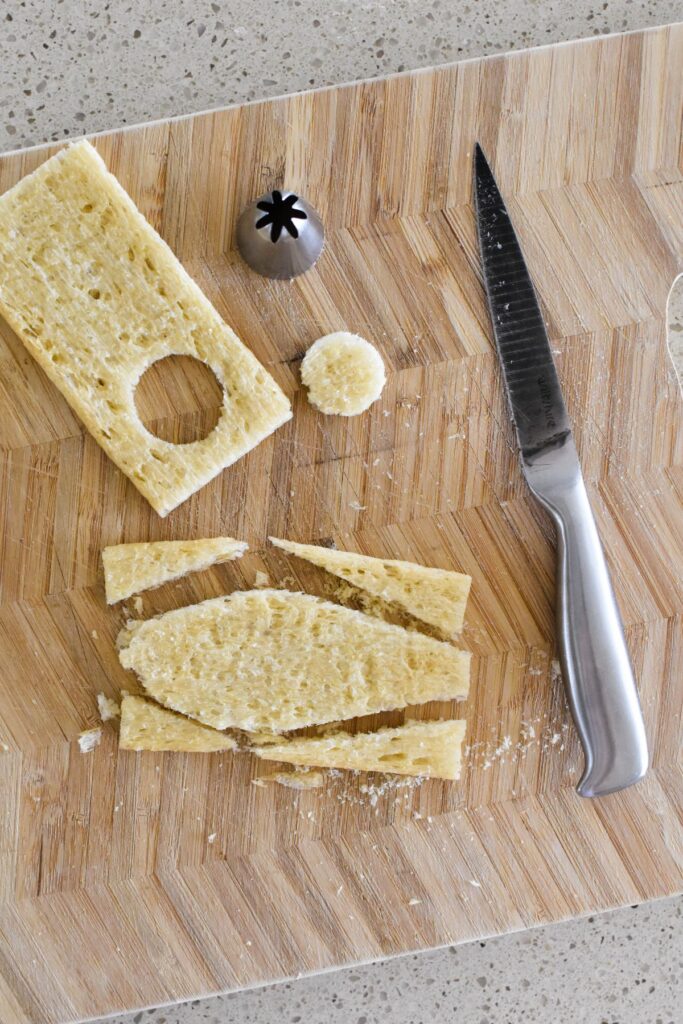
To turn the cheese rounds into a bunny, I've cut out ears, a tail and paws from crispbread to complete the bunny shape.
Continuing with the Easter theme, I've also added small dutch carrots amongst the mix along with foil-wrapped Easter eggs to frame the board.
There are endless themes you can design a board around, of course. These include:
- Christmas
- Halloween
- Valentine's Day
- Kids party
- Breakfast
- Dessert
- Italian
- Mediterranean
- Vegan.
2. Select a variety of quality, fresh items
For a delicious board that has people coming back again and again, choose:
- fresh, good quality food items
- a variety of items to suit the tastes and preferences of your guests (popular options include crackers, cheese, nuts, dried fruits, fresh fruits, vegetables, dips and cured meats)
- items that go well together (cheese and crackers, asparagus and pancetta, dried apricots and walnuts etc)
- items that can easily be selected and eaten without utensils.
3. Arrange the items to get that wow factor
Keep in mind ideas like balance and contrast when designing your board.
You have lots of textures and colours to play with!
You also don't want any gaps, so start by placing larger items like cheeses in the centre of the box or board.
Work your way outwards, filling in gaps with smaller items like berries and nuts.
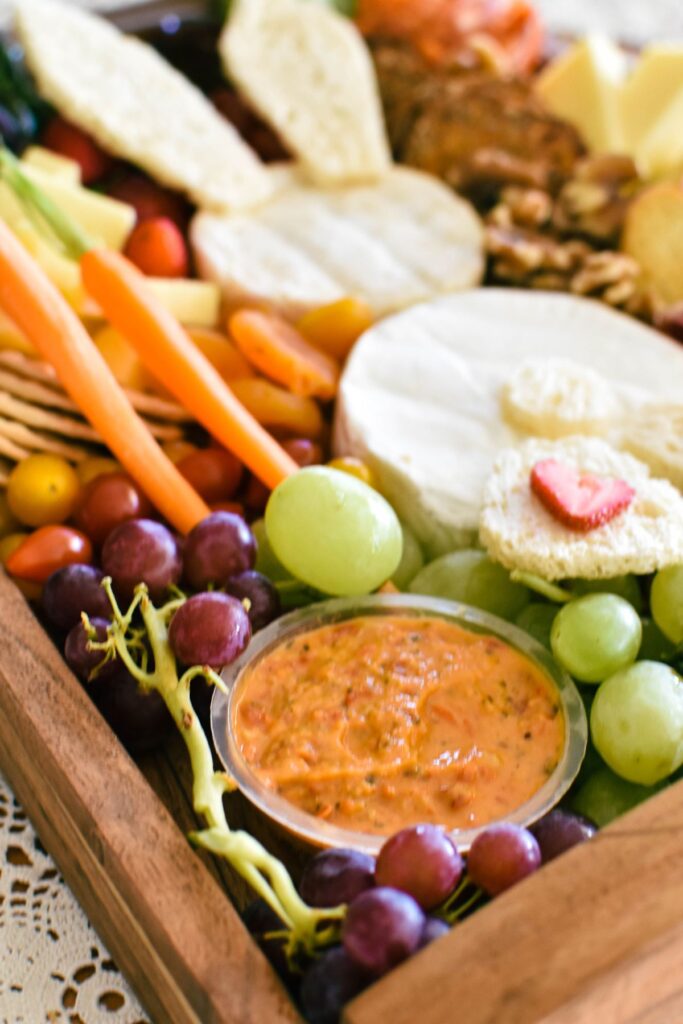
You can also use small containers to keep items like olives and dips contained and separate from other items.
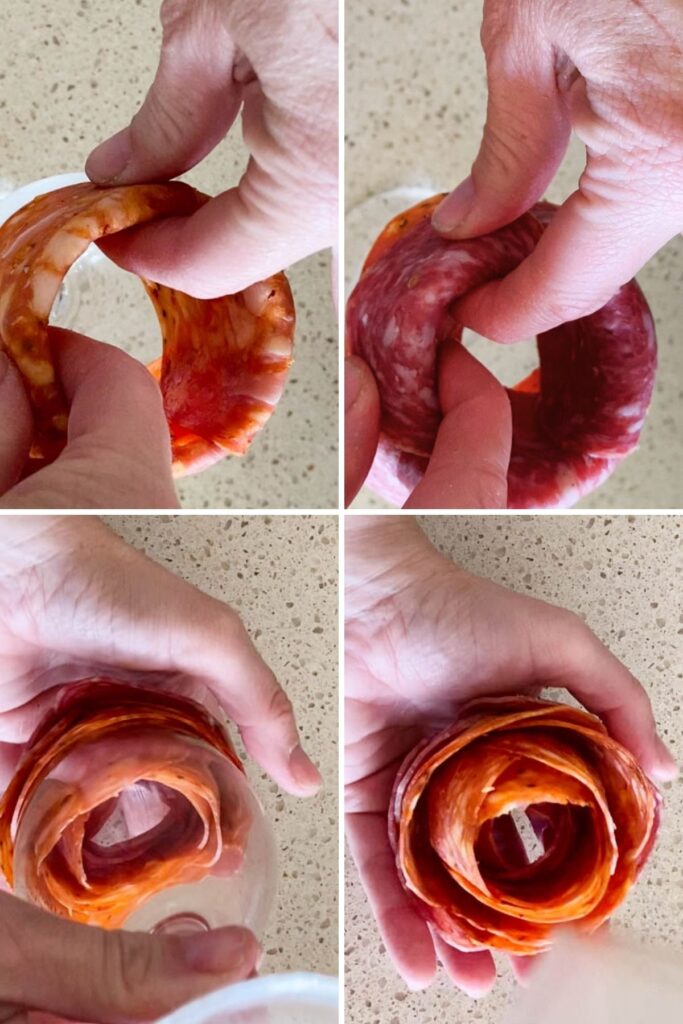
Go for some fancy touches when it comes to the meats. Pancetta can be rolled or folded and salami can even be fashioned into a flower!
How to make a salami flower
Using a wine glass, place pieces of thinly sliced salami – overlapping – around the edge of a wine glass. The salami should be half inside the wine glass and half out.
You'll need to create about 4 layers, placing each successive layer a little less outside the glass and more inside the glass.
Once complete, turn to wine glass upside down and gently ease your salami flower from the glass.
4. Select the right board/box
You want your board or box to be nicely packed with a selection of food items.
I've used a 37 x 27cm/14.5 x 10.5 inches board here.
If you use more or less ingredients, you'll obviously need a larger or smaller board.
The board I've used here also has low edges, making it perfect for containing all of the ingredients neatly.
If you want to transport your Easter Grazing Feast, a box is a good idea.
5. Make sure it can be left out for a couple of hours
The whole idea of a grazing board is to graze!
You want to be able to leave the board out for a couple of hours and nibble and chat.
So make sure you keep all items that require refrigeration in the fridge until just before serving.
6. Observe hygiene practices
Make sure everyone enjoys the feast without any consequences by always following recommended hygiene and safe food handling practices:
- wash your hands before preparing the board
- clean and sanitise all surfaces and utensils before starting to assemble the board. This includes cutting boards, knives, and any other tools you plan to use.
- assemble the grazing board on a clean and sanitised platter or board
- don't use any non-edible decorative items
- arrange the items on the board in a way that allows your guests to easily access and serve themselves while reducing the possibility that they'll touch other items
- if any food items remain uneaten, promptly refrigerate (if safe to do so) or discard.
7. Get inspired
Look around the web and Pinterest for inspiration.
Take ideas from here and there to come up with your very own Easter Grazing Board.
Or, if you love mine, you'll find the details to help you recreate it below.
More Easter Bunny-approved recipes
Made this recipe and love it? Please take a moment to rate the recipe and leave a comment below. It’s such a help to others who want to try the recipe. (And it really makes my day to hear how Nana Ling's recipes are being made, shared and loved all around the world! - Libby x)
For more fun and deliciousness in the kitchen, follow along on Facebook, TikTok and Pinterest, and subscribe for new posts via email.
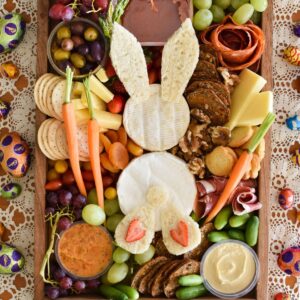
DIY Easter Grazing Box
Equipment
- med/large board or box for serving (37 x 27cm/14.5 x 10.5 inches, approx)
Ingredients
- 150 grams crackers (include a variety, if possible)
- 1 round brie (200 grams)
- 1 smaller round camembert (100-150 grams)
- 100 grams cheddar cheese, sliced into sticks or wedges
- 3 Cruskits (or similar wafer/crispbreads) (cut into shapes to help form a cheese bunny)
- 100 grams salami (arranged into a rose)
- 2 small store-bought pots of dip (I've used Yumi's Hommus and Capsicum dip)
- 50 grams pancetta (rolled/folded into tubes)
- 1 small store-bought pot of quince paste
- 3 bunches grapes
- ½ punnet mini cucumbers
- ½ punnet mini tomatoes
- handful walnuts
- handful dried apricots
- handful strawberries
- 3 small dutch carrots
- ½ bunch mini asparagus, grilled in olive oil
- selection of foil-wrapped Easter eggs
Instructions
- Cut out ears, a tail and two paws for the "bunny". Set aside.
- Cut two slices of strawberry to form the pads of the bunny's paws. Set aside
- Place the two cheese rounds on the board with the smallest at the top.
- Arrange all of the other ingredients around the cheese rounds.
- Assemble the bunny by placing the ears, tail and paws in the appropriate positions.
- Serve with Easter eggs scattered around the box or board.
Notes
Nutrition: The nutrition information is an automatically generated estimate and is not guaranteed to be accurate.

Leave a Reply