
Tomato Chutney isn't just the thing our mums or nanas made! It's a delicious addition which turns a meal or snack into something special.
This quick Tomato Chutney Recipe gives you everything you need to easily create your own version of this tasty and versatile condiment.
Jump to:
What is chutney?
Chutney is an idea our mums and nanas borrowed from India, and is now a popular condiment (and way of preserving food) throughout the world.
It's a chunky spread that's cooked up with chopped fruits, vinegar, spices and sugar.
Chutney vs relish
Chutney and relish are both condiments and often have similar ingredients. It's not easy to come up with a general rule to distinguish the two, however chutneys are often chunkier and cooked longer compared to relish.
Ingredient notes
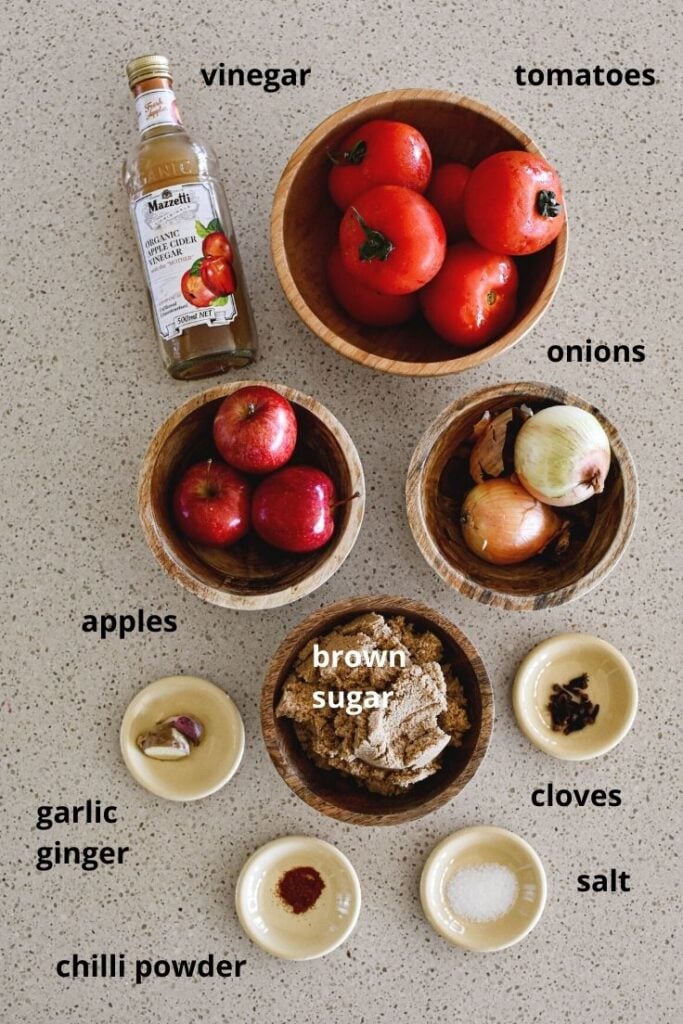
This Tomato Onion Chutney recipe requires 1 kg of tomatoes and produces about 750ml of chutney. It will work with any variety of tomato.
Got more tomatoes you want to transform? Just double, triple or multiply the quantities according to your wishes. Or, check out my collection of tomato recipes here. The tomato sauce and tomato relish recipes are particularly popular.
So, apart from the tomatoes, you'll also need:
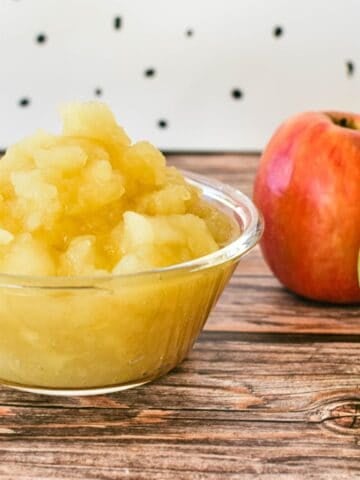
- apples (any variety is fine)
- onions (I prefer brown onions, but again any variety is fine)
- brown sugar (a different flavour profile compared to white sugar, but you can use white sugar in the recipe)
- cider vinegar (again, you can sub in any variety but it will impact the flavour)
- various spices and herbs.
You may also need to add a teaspoon of cornflour, mixed with a little extra vinegar, at the end to thicken the chutney.
All of the ingredient quantities can be found in the recipe card at the end of this post.
How to make Tomato Chutney
There's no resting period required for this recipe, so you can have a jar of tomato chutney ready to go in less than a couple of hours.
Start by roughly chopping the tomatoes and onions. Next, peel and core the apples and roughly chop those. Aim for pieces 1-2cm by 1-2cm.
Now, place all the ingredients (except the bcornflour) in a large saucepan and heat gently until the sugar dissolves. Once the sugar is dissolved, increase the heat until the mixture starts to boil.
Boil gently, uncovered and stirring occasionally, for approximately 1 hour and 15 minutes or until most of the liquid has evaporated and you're left with a thick sauce.
TIP: If the mixture hasn't thickened enough, add enough extra vinegar to one teaspoon of cornflour to reach a runny paste consistency. Add to the chutney and continue to boil for another 1-2 minutes or until mixture is thick and glossy.
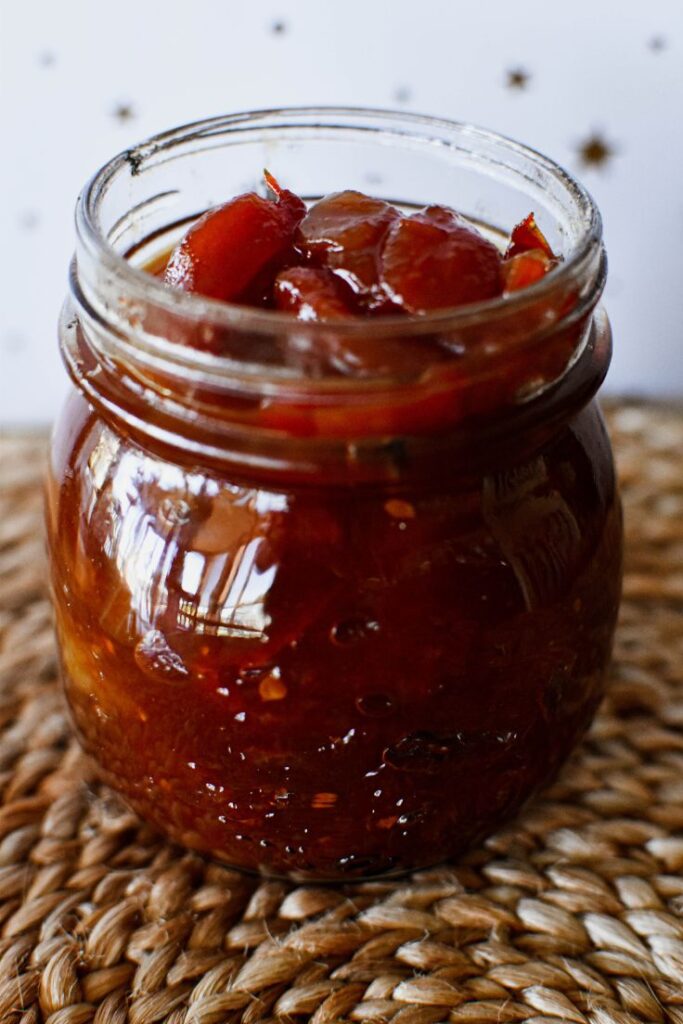
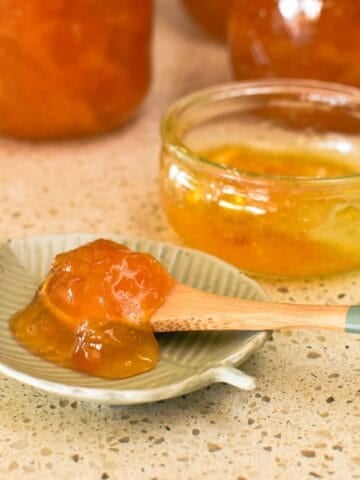
Pour hot Tomato Chutney mixture into sterilised jars and seal immediately.
How can I tell if my chutney is ready?
Chutney is a nice, thick condiment and there should be no runny liquid on the surface of the mixture once it's been cooked enough.
Some people suggest dragging a wooden spoon through the mixture as a test. If you can see a nice clear line on the bottom of the pot, it's ready.
You need to take care that you also don't over-do your chutney and burn it.
TIP: I recommend staying safe by adding the cornflour/vinegar mixture to thicken it up towards the end and avoid burning the chutney.
Storing your chutney
The amount of time your tomato chutney will last depends on how well you sterilised the jars, how well you seal the jars and whether the jar is stored in a cool, dark place, the fridge or somewhere else.
There are many ways of doing all of these things, and I'm not going to cover them here as there is a tonne of information out there already.
I go for a very simple method that still means I can store my chutney in the pantry for a few months, at least, and for another month or more once opened in the fridge.
Simply sterilise the jars and lids by placing on a hot setting in the dishwasher. Pour the hot mixture into the jar and seal immediately using a fresh, clean, plastic-lined twist on lid – making sure it's on tightly.
I don't bother with the water bath step as this chutney has plenty of sugar and vinegar to act as a preserving agent. But please do your own research!
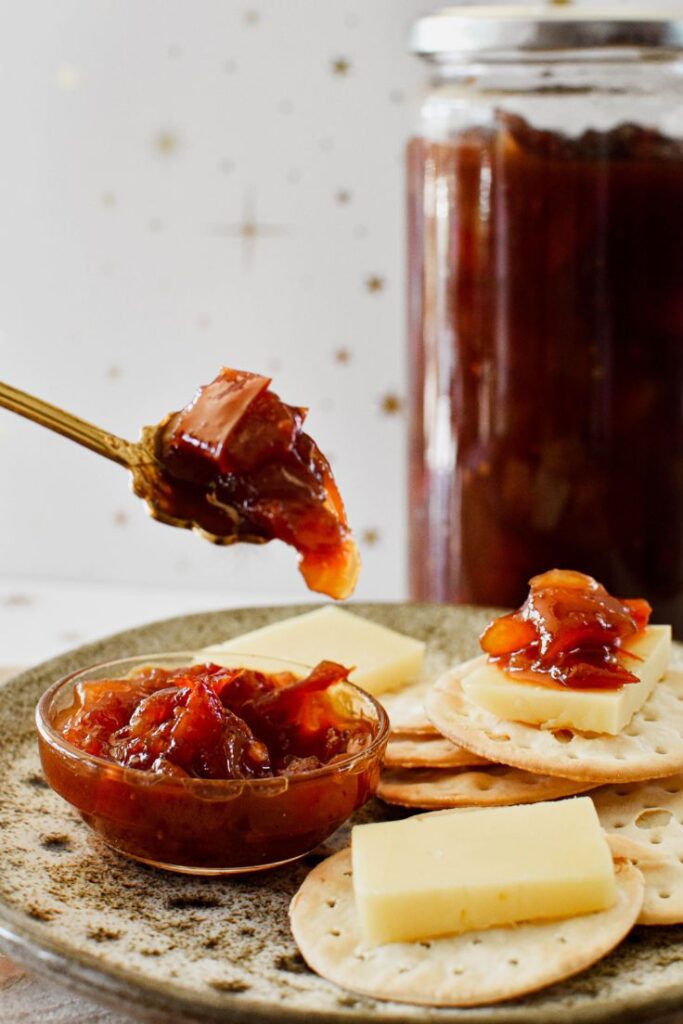
Enjoying your condiment
There are so many ways to enjoy tomato chutney! Here are a few ideas to get you started:
- Make a ham, cheese and tomato chutney sandwich
- Add it to a burger
- Enjoy it with a meat pie
- Serve it with pate and cheese
- Add a little to the mix when making homemade sausage rolls.
- Cook a juicy steak and top it with chutney.
More perfect preserves
If you love making up a chutney, you might also enjoy these recipes:
Made this recipe and love it? Please take a moment to rate the recipe and leave a comment below. It’s such a help to others who want to try the recipe. (And it really makes my day to hear how Nana Ling's recipes are being made, shared and loved all around the world! - Libby x)
For more fun and deliciousness in the kitchen, follow along on Facebook, TikTok and Pinterest, and subscribe for new posts via email.

Tomato Chutney
Equipment
- sterilised jars (recipe makes about 750ml of chutney)
Ingredients
- 1 kg tomatoes
- 3 small apples (or 2 medium-sized)
- 2 medium onions
- 1 ½ cups brown sugar
- 1 garlic clove, finely grated
- 1 small piece ginger (roughly double size of garlic clove), finely grated (or ¼ teaspoon ground ginger powder)
- ¼ teaspoon chilli powder
- 1 teaspoon salt
- 1 teaspoon whole cloves (or ¼ teaspoon ground cloves)
- 1 cup cider vinegar
- 1 teaspoon cornflour (plus enough extra vinegar to make a runny paste) – if required to thicken chutney
Instructions
- Roughly chop tomatoes and onions.
- Peel and core apples and roughly chop.
- Place all ingredients (except cornflour) in a large saucepan and heat gently until sugar dissolves.
- Increase heat until mixture starts to boil and boil gently, uncovered and stirring occasionally, for approximately 1 hour and 15 minutes or until most of the liquid has evaporated.
- Add enough extra vinegar to the cornflour to reach a runny paste consistency. Add to the chutney and continue to boil for another 1-2 minutes or until mixture is thicker and glossy.
- Pour hot mixture into sterilised jars and seal immediately.
Video
Notes
- For best results, chop your main ingredients evenly - about 1-2cm by 1-2cm.
- Is your chutney cooked enough? There should be no runny liquid on the surface of the mixture once it’s been cooked. Some people suggest dragging a wooden spoon through the mixture as a test. If you can see a nice clear line on the bottom of the pot, it’s ready.
- Take care not to burn the chutney. I recommend staying safe by adding the cornflour/vinegar mixture to thicken it up towards the end and avoid burning the chutney.
- Use sterilised jars. I sterilise my jars and lids simply by placing on a hot setting in the dishwasher.
- Pour the hot mixture into the jar and seal immediately using a fresh, clean, plastic-lined twist on lid – making sure it’s on tightly.
- Store your chutney in a cool, dry place and, once opened, in the fridge for up to one month. The amount of time your chutney will last depends on how well you sterilised the jars, how well you seal the jars and whether the jar is stored in a cool, dark place, the fridge or somewhere else.
- Make a ham, cheese and tomato chutney sandwich
- Add it to a burger
- Enjoy it with a meat pie
- Serve it with pate and cheese
- Add a little to the mix when making homemade sausage rolls.
- Cook a juicy steak and top it with chutney.

Alan
I was taught that chutney has more than one fruit like tomatoes and Apple while a relish has only one like tomatoes whether this is one hundred percent correct I'm not sure but seems to be correct from the many recipes I've seen..
Libby Hakim
Interesting! That does seem to be true also from what I've seen. Thanks for your comment 🙂