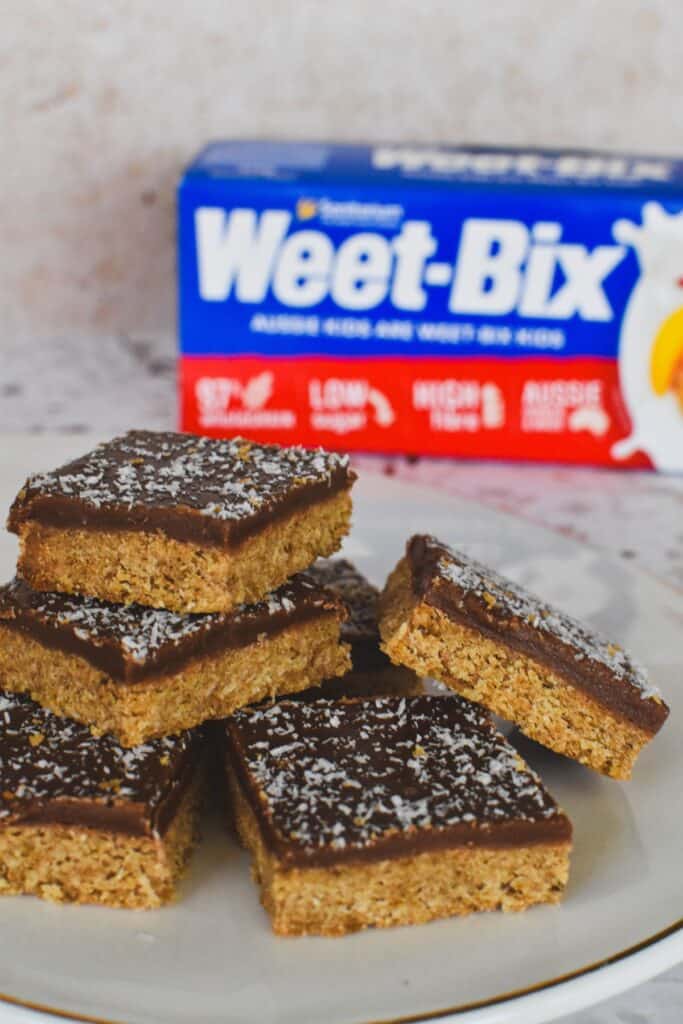
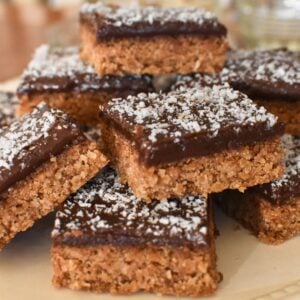
This Weetbix Slice with chocolate icing is an Aussie classic that'll quickly become a family favourite – if it's not already.
Jump to:
Why you'll be coming back for more
My family has loved this recipe for decades, and here's why I reckon you'll be a fan too:
- it's versatile – pop it into lunch boxes or enjoy a square (or two) as a sneaky snack
- it's so moreish – you can't beat the crunchy, biscuity base combined with the smooth chocolate icing
- you'll find clear step-by-step instructions and photos below – so even the newbie home cook can find success with this recipe
- it's packed with our favourite cereal, Weet-Bix – it's a brilliant ingredient and also found in my Rum Balls made with weetbix recipe and the sweet Weetbix Marshmallow Slice.
Ingredient notes
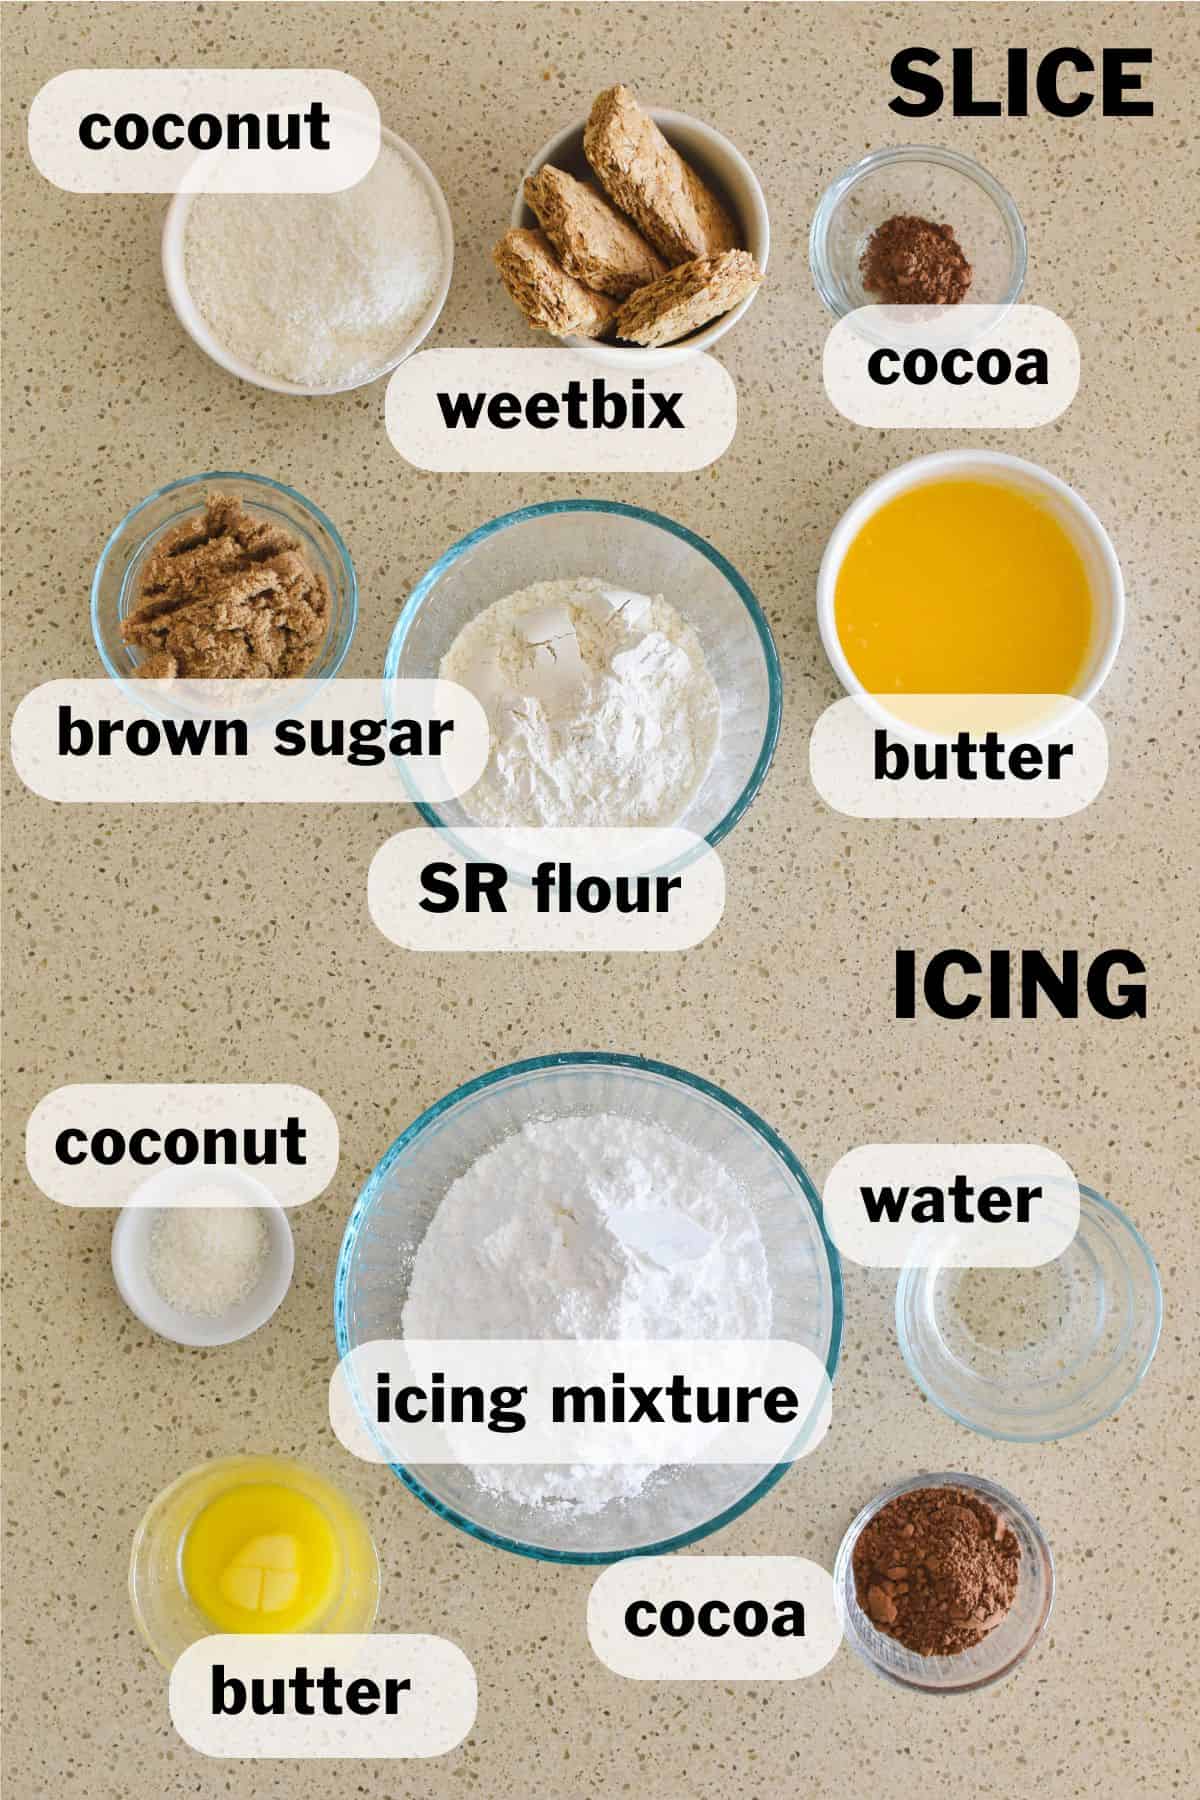
You'll of course need weet-bix – three and a half of them! You might alternatively know them as weetabix, Vita Brits or wheat biscuits.
The coconut needs to be unsweetened desiccated coconut to get the lovely fine and crumbly texture right.
SR flour or self-raising flour is a popular and widely available product in Australia. However, you can simply add 2 teaspoons of baking powder to each cup of plain flour / all purpose flour as a substitute.
For the cocoa, go with baking or dutch-processed cocoa for optimum flavour.
Finally, you can use icing mixture or icing sugar in this recipe. Icing mixture is simply icing sugar with a little cornflour added to ensure smoothness, and either option will work in this recipe.
Variation idea: Use 100s & 1000s, chocolate sprinkles or crushed nuts instead of coconut to decorate the top of the slice.
The full ingredient list including measurements can be found in the recipe card at the end of this post.
How to make Chocolate Weetbix Slice
Start by pre-heating your oven to moderate (180 degrees celsius / 350 degrees fahrenheit, fan-forced).
Next, grease a slice tin (approx 26 x 16 cm) and line with baking paper, leaving excess on the sides to lift out slice once cooked.
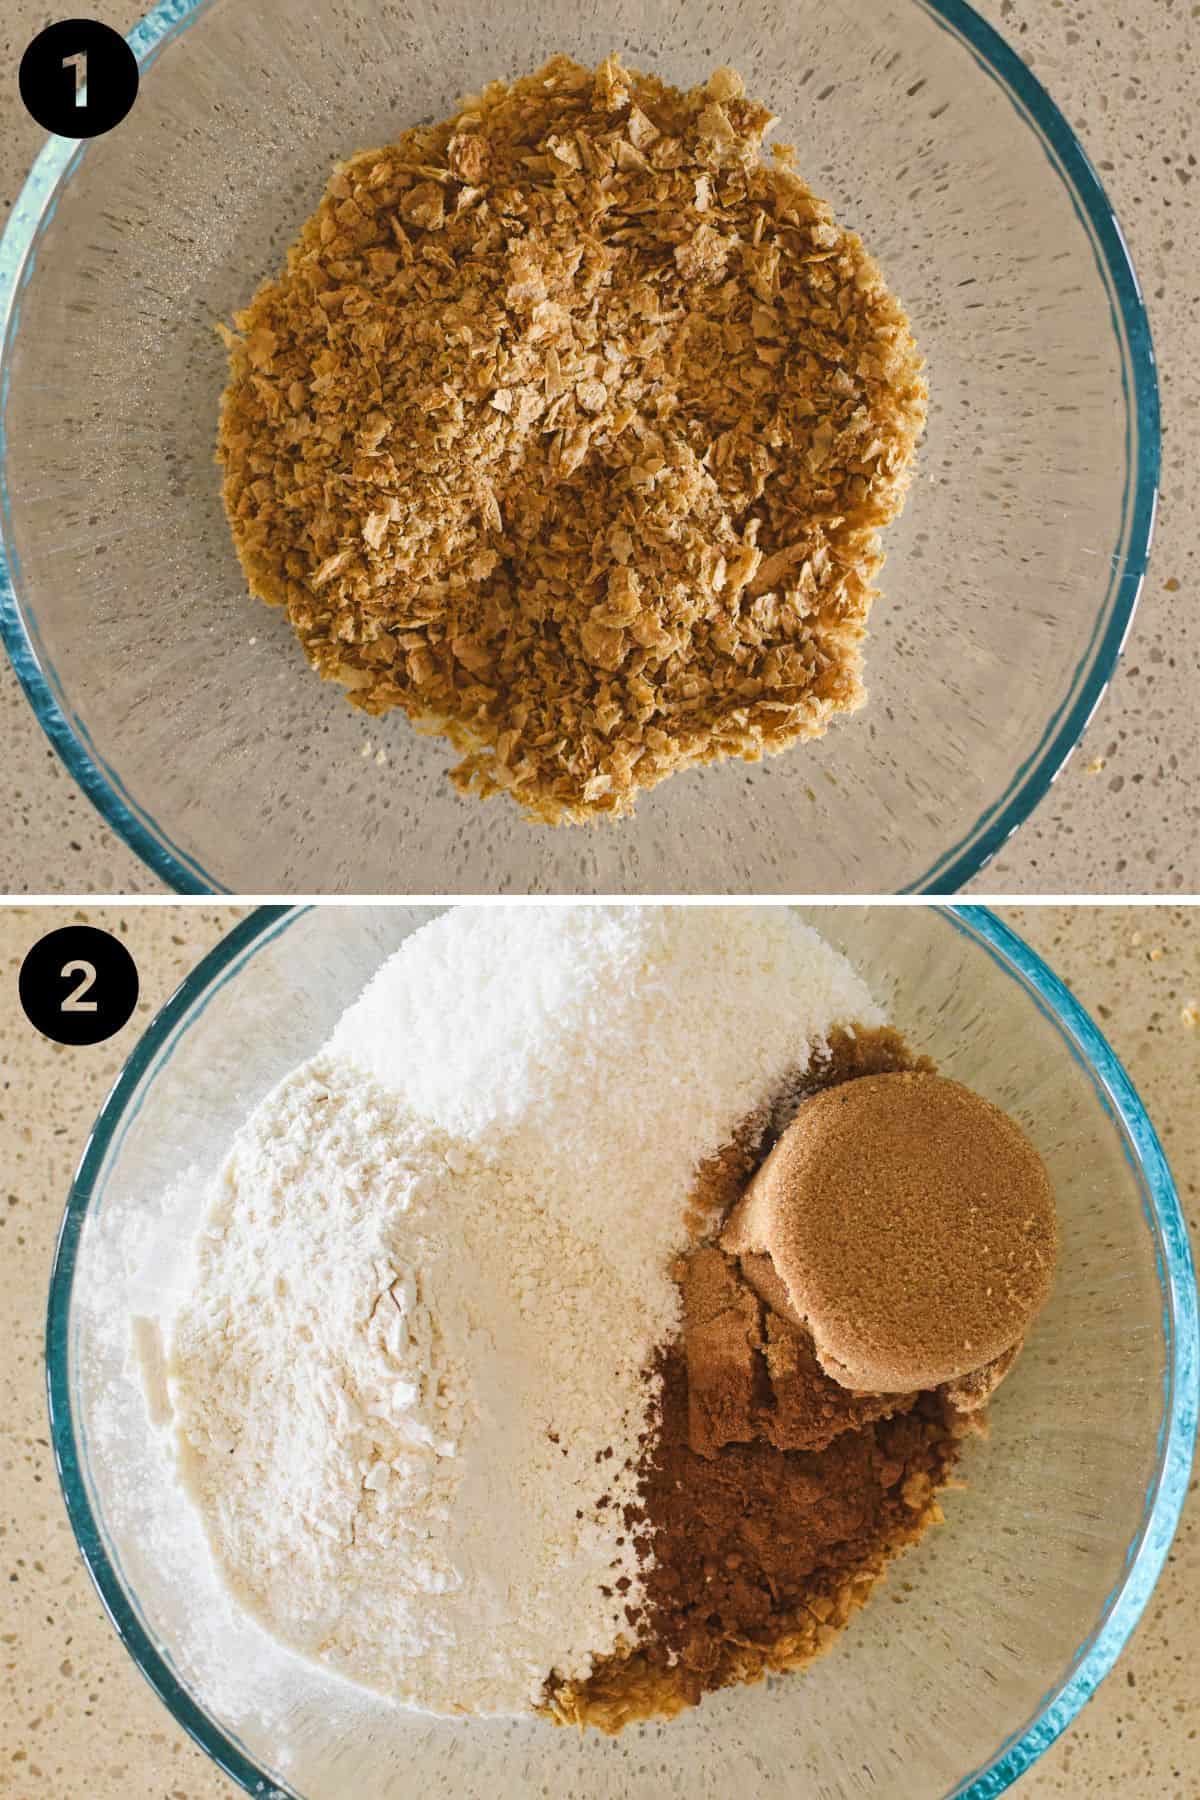
Crush the weetbix into a bowl (see image 1). Add the remaining dry ingredients to the bowl (see image 2) and stir to combine (see image 3).
TIP: Make sure to break up any lumps of brown sugar in the mixture.
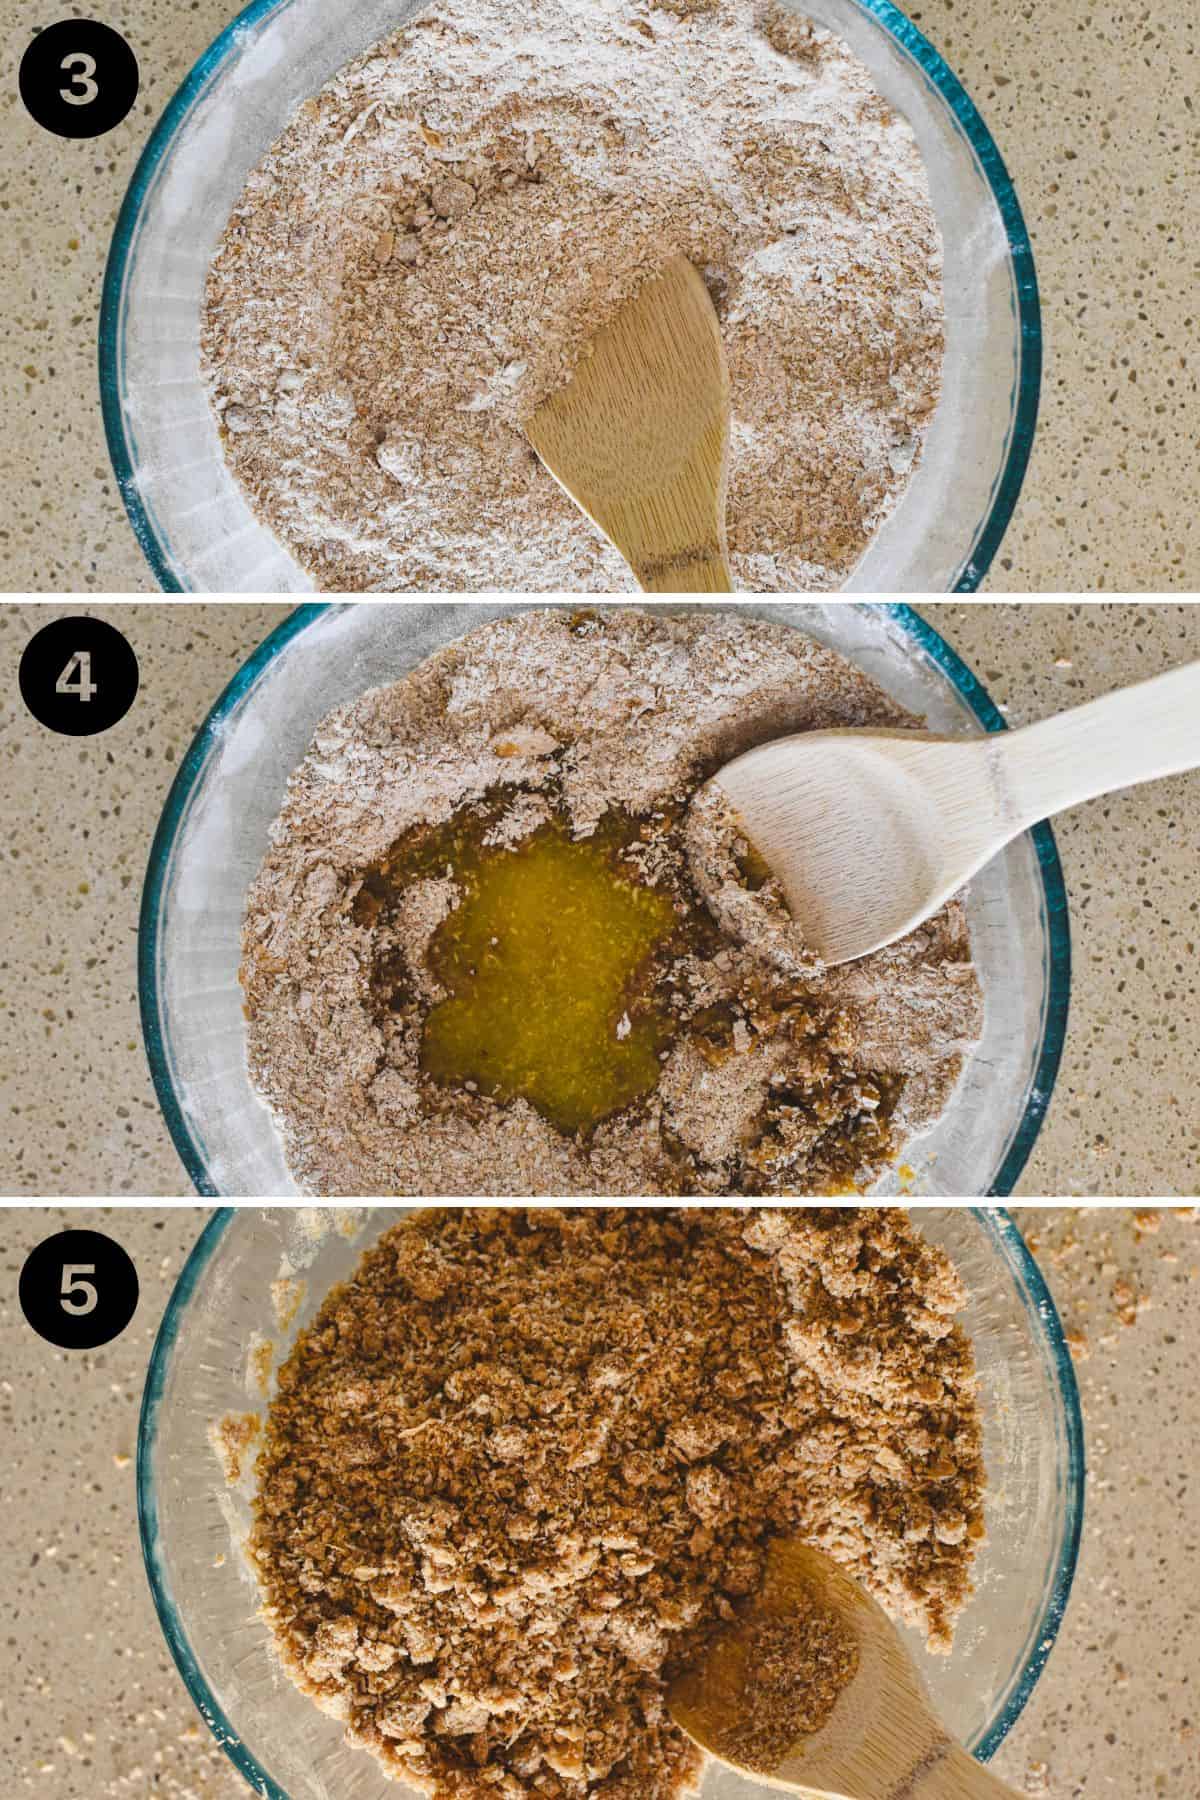
Add the melted butter and to the dry ingredients (see image 4). Mix well. The mixture will only just hold together and look a little dry and crumbly (see image 5).
Pour the mixture into the prepared slice tin (see image 6). Press mixture firmly into slice tin with your hands (see image 7). Finally, even the top surface of your slice by moving the back of a spoon back and forth over the slice (see image 8).
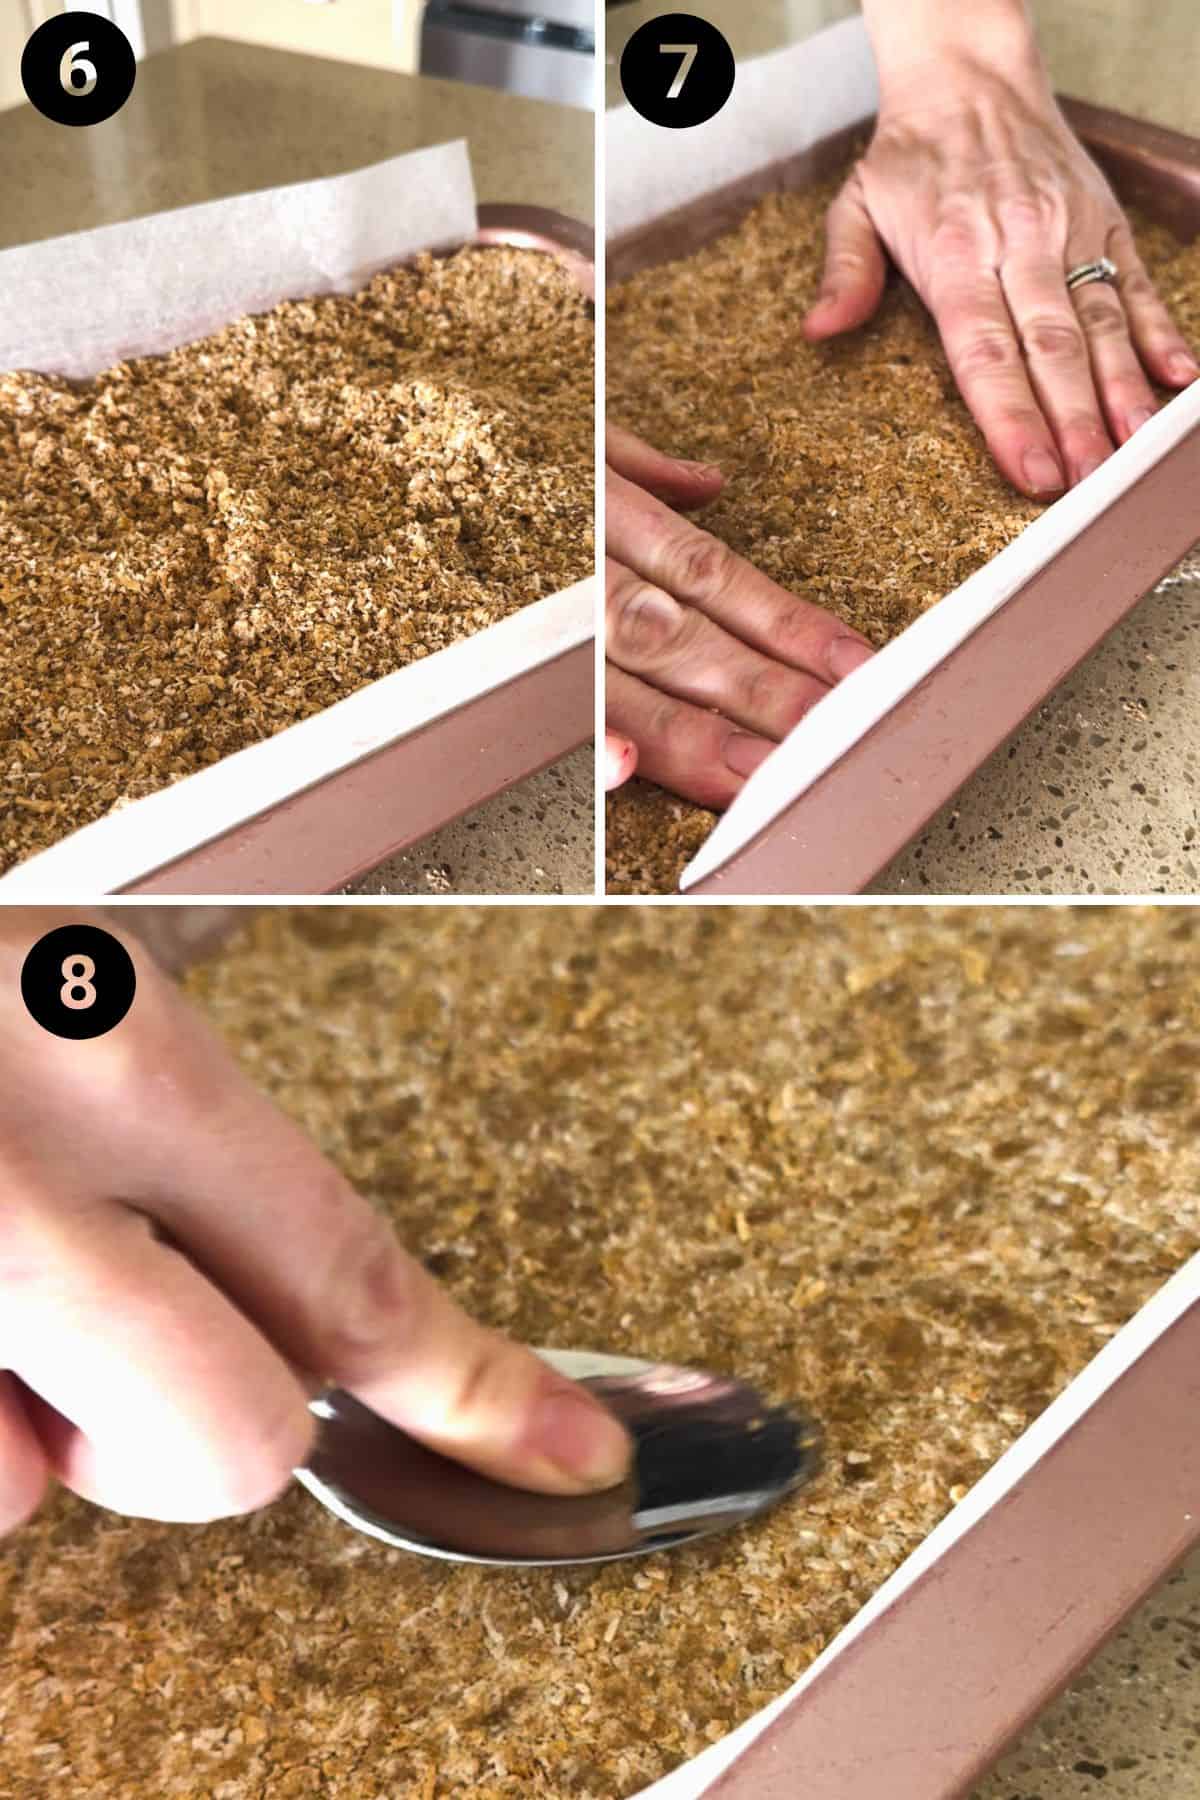
TIP: Make sure the mixture is packed in well, otherwise you'll end up with a slice that crumbles.
Place the slice into your pre-heated oven and bake for 20 minutes.
While the slice is baking, start measuring out the ingredients for the icing. This slice is iced while hot from the oven so you'll need to have it ready to go.
How to ice your slice
Start preparing the icing a few minutes before the slice is ready to be removed from the oven.
Place the icing sugar or mixture and cocoa into a bowl.
TIP: If the icing sugar is lumpy, you'll need to sift it first. Otherwise, there's no need to sift it.
Add the melted butter and 2 tablespoons of the boiling water to the icing sugar and stir to combine.
You want the icing to be spreadable – runny but not too runny (see image 9). If necessary, add enough of the remaining tablespoon of boiling water to ensure the icing is soft enough to spread.
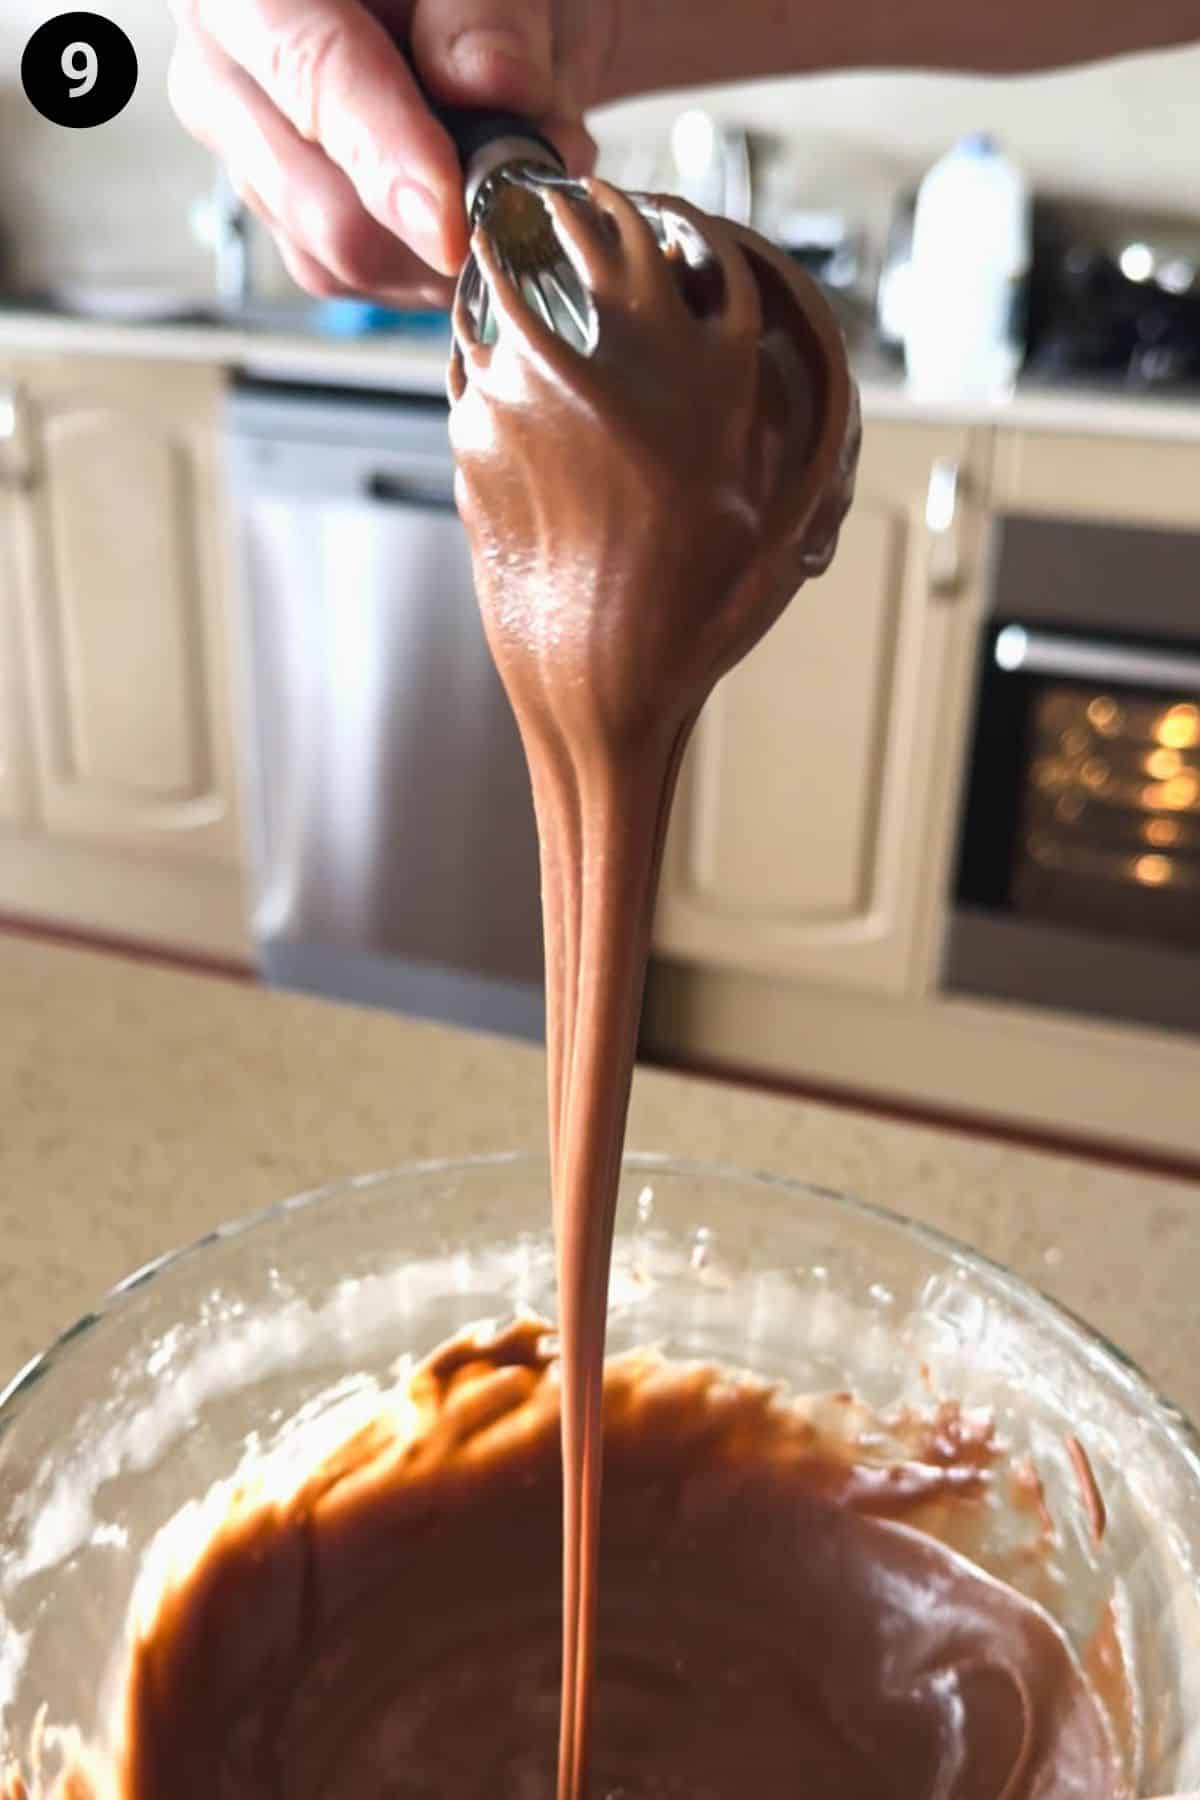
Spread the icing over the slice while still hot (see images 10 and 11). Sprinkle with additional coconut if desired (see image 12).
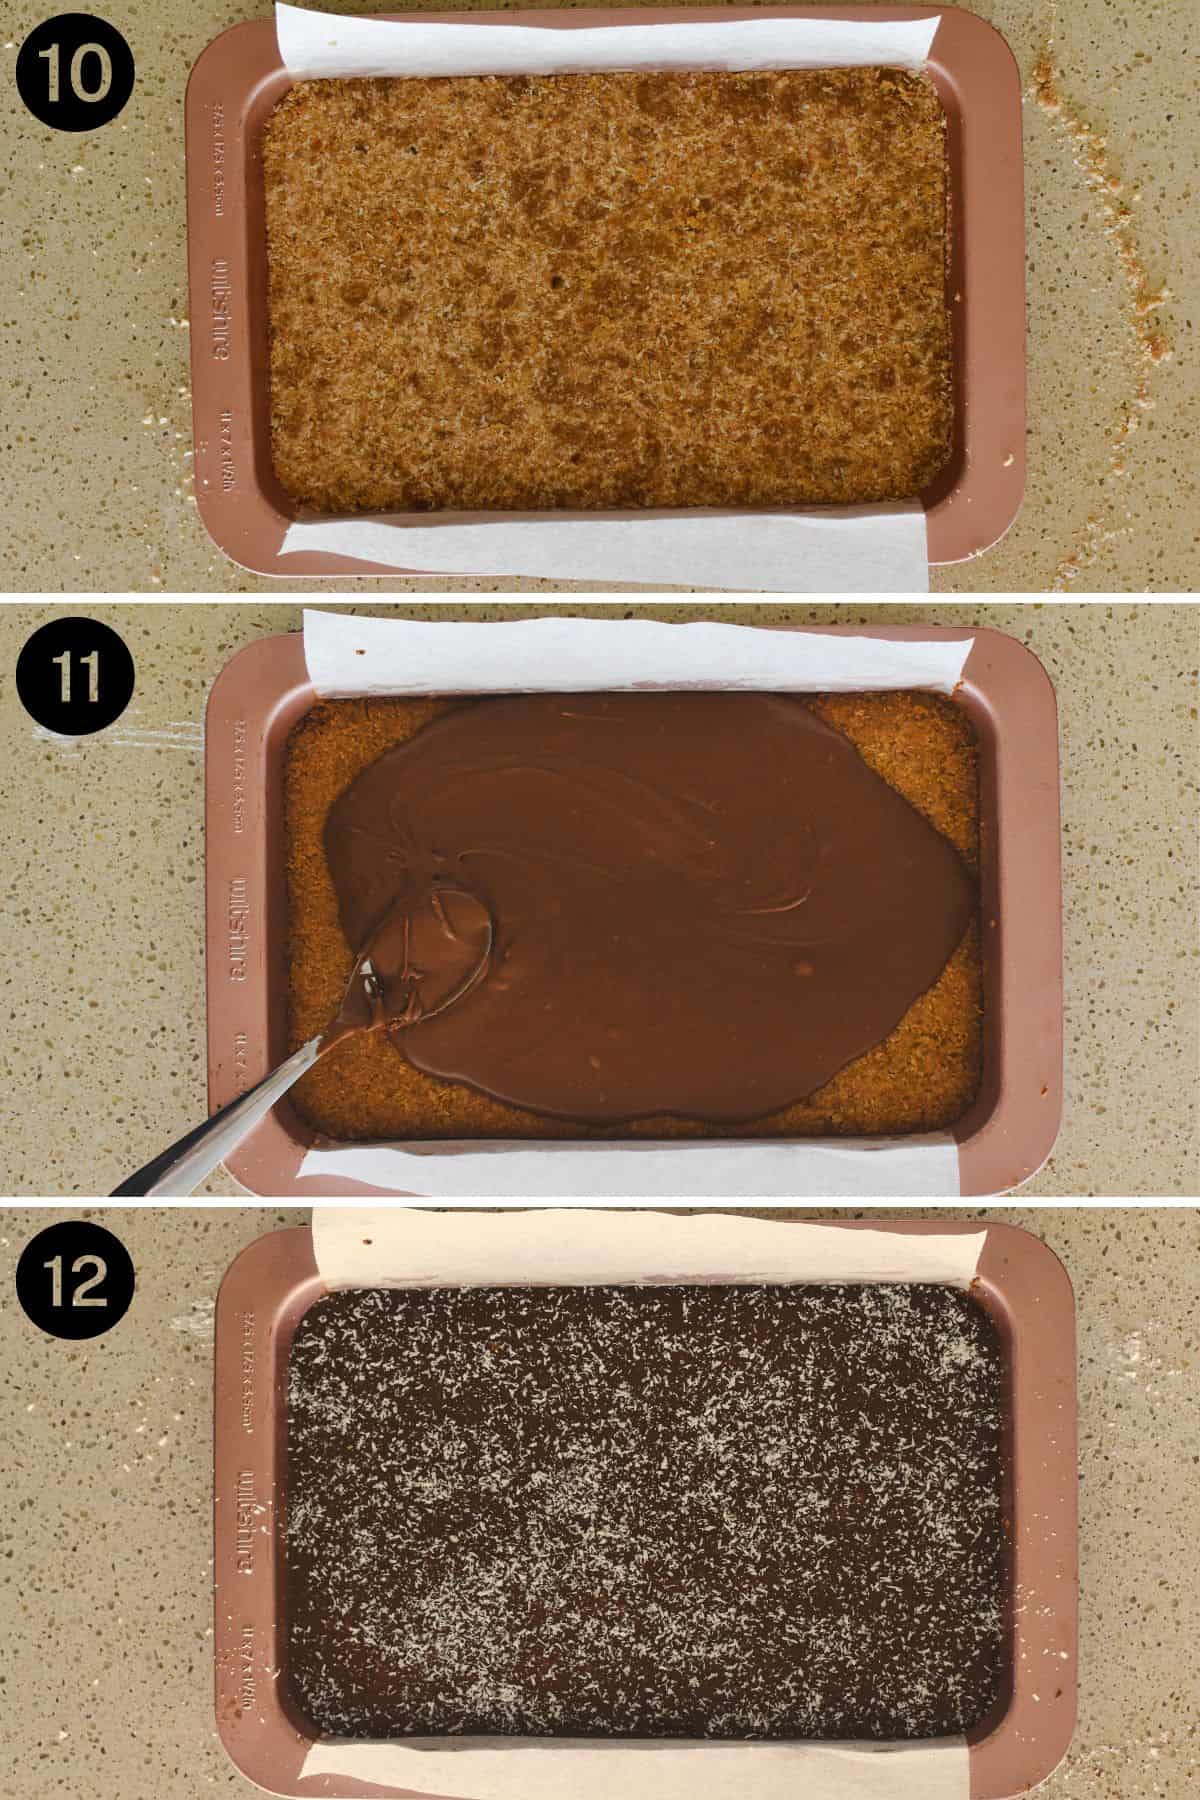
Allow the slice to cool completely before lifting the slice whole from the tin using the baking paper. Cut into 24 pieces with a sharp knife.
TIP: For a nice smooth icing, don't bump the tray as the slice is cooling – the icing will easily squish and crinkle.
Recipe FAQs
Stored in an airtight container in a cool, dry place, Weetbix Slice should keep for up to one week.
You can – for up to a few months if wrapped and placed in an airtight container – though I always say fresh is best.
A recipe packed with nostalgia
As you bite into this slice, you can almost taste the warm memories!
I don't remember a time when my mum didn't make this slice. When I think of it, I can see it perched inside a Tupperware container from the 70s. But it didn't stay there for long. It always disappeared quickly.
I've always loved it and here's some evidence of that: on the original recipe written out by my mum, my much younger self has added a little note. "Mum I want to cook this."
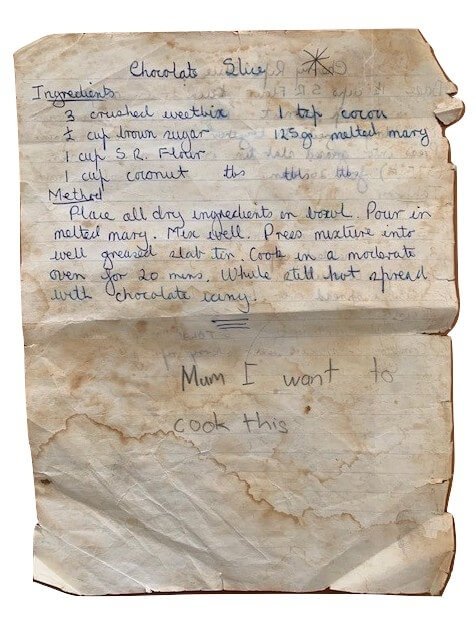

I also hear the memories when I'm cooking this one up.
Aussie kids, are weet-bix kids, Aussie kids. Are. Weet. Bix. Kids... remember the jingle from the 1980 and 1990s? And weet-bix was around quite a while before that, too. It was developed in Sydney, Australia during the mid 1920s and first produced in a factory on Parramatta Road, Leichhardt.
Want more cereal recipes?
There are also so many brilliant recipes that use other breakfast cereals as an ingredient. Here are some more favourites:
Made this recipe and love it? Please take a moment to rate the recipe and leave a comment below. It’s such a help to others who want to try the recipe. (And it really makes my day to hear how Nana Ling's recipes are being made, shared and loved all around the world! - Libby x)
For more fun and deliciousness in the kitchen, follow along on Facebook, TikTok and Pinterest, and subscribe for new posts via email.
Weetbix Slice
Equipment
- slice tin (approx 26 x 16 cm)
Ingredients
- 3 ½ weetbix (or 50 grams of another similar wheat-based cereal)
- ½ cup brown sugar (115 grams)
- 1 cup SR flour (150 grams) (or 1 cup plain /all purpose flour + 2 teaspoons baking powder)
- 1 cup desiccated coconut (90 grams)
- 1 teaspoon cocoa
- 125 grams butter, melted
Icing
- 2 cups icing sugar/mixture (280 grams)
- 1 ½ tablespoons cocoa
- 1 tablespoon butter, melted (20 grams)
- 2-3 tablespoons boiling water
- 2 teaspoons desiccated coconut (optional, for decorating)
Instructions
- Pre-heat oven to moderate (180 degrees celsius / 350 degrees fahrenheit, fan-forced).
- Grease a slice tin (approx 26 x 16 cm) and line with baking paper, leaving excess on the sides to lift out slice once cooked.
- Crush weetbix well into a bowl.
- Add remaining dry ingredients to bowl and stir to combine.
- Add melted butter to dry ingredients. Mix well.
- Press mixture into slice tin with hands and even the top surface out using the back of a spoon.
- Cook for 20 minutes.
- Start preparing the icing a few minutes before the slice is ready to be removed from the oven. This slice is iced while hot from the oven.
Icing
- Place icing sugar/mixture and cocoa into a bowl.
- Add melted butter and 2 tablespoons of the boiling water to the icing sugar and stir to combine.
- If necessary, add enough of the remaining tablespoon of boiling water to ensure the icing is soft enough to spread.
- Spread the icing over the slice while still hot. Sprinkle with additional coconut if desired.
- Allow to cool completely before lifting the slice whole from the tin using the baking paper. Cut into 24 pieces with a sharp knife.
Video
Notes
- Make sure to break up any lumps of brown sugar when mixing the dry ingredients.
- Make sure the mixture is packed well into the slice tin, otherwise you'll end up with a slice that crumbles.
- When making the icing, if the icing sugar is lumpy, you'll need to sift it first. Otherwise, there's no need to sift it.
- For a nice smooth icing, don't bump the tray as the slice is cooling – the icing will easily squish and crinkle when it's still setting.






Kerry
I love this recipe. Sometimes I use peppermint essence to make choc-peppermint icing.
Sharon
This is the best! So easy and delicious and perfect for lunch boxes.
Libby Hakim
It's a classic. Thanks for the feedback and rating 🙂 Happy cooking!
Dianne
As below, commented in the wrong place, lol
Tracey
I made it today. The ingredients don't make alot for the base.
Libby
Hi Tracey. Thanks for the review and comment. Did you use a 26 x 16 cm slice tin? The quantities should work well for this size tin. Libby 🙂
Dianne
@Tracey, I agree Tracy made this today.
Dianne
@Libby, Fantastic slice, I do remember this growing up on the farm at Powlett Plains. Just only my comments on this The slice pan sizing is different. I noticed you use the Rose Coloured Willow one in the video, that measures 27.5 x 17.5 cm. The other two pictures you have, not sure what size pans they are?. Looked everywhere on the internet, can’t find your sizing 26 x 16?. I actually doubled the base mixture to get a good base as you have shown. Loved it, great recipe ❤️
Libby Hakim
Hi Dianne - sorry, have been a bit inconsistent with the measurements there as I've updated photos. Anything around that size will be fine. I do have the Willow one and you're absolutely right about its measurements. I'll take another look over this recipe soon. It's a good one!
Zohra Aly
It looks yum, and I'm fasting so ....
I love the story behind it even more Libby, down to your cute hand-written note to your mum, and the Pop Mac crib story. I love hand-written recipe books- they're full of history in all the splodges and stains and hand-writing 🙂
Libby
Hi Zohra! Aww, thanks for your lovely comments. And you've reminded me of one of my favourite Sydney memories - the Lebanese sweets shops bustling each night during Ramadan and the wonderful special Ramadan desserts. Ramadan Mubarak.
Sandra Robbins
I remember eating this but my Mother never made it nor have I. It must have been at a friends house.
Just reading the ingredients I can taste it and relive the memory.
Must try this.
Libby
Hi Sandra. It's definitely one worth trying! It tastes just like it did when I was a kid 🙂 Happy cooking!
Sharon
I use white sugar, 3 tblspns cocoa and 150g butter.