
You won’t beat this easy 3-ingredient Aussie Damper Recipe.
Jump to:
Australia's original damper recipe
Based on an original recipe used by Aussie bushmen and early settlers in the 1800s, and another Damper recipe promoted during the bread shortages of 1943, this yeast-free bread is still an Aussie favourite.
This Damper Recipe receives many five star ratings and rave reviews. Why do people love it?
Well, it includes instructions for cooking at home in an oven and using an outdoor campfire requires just 3 simple ingredients.
The recipe relies on several old-fashioned recipes to get the balance of those ingredients spot on and deliver an authentic damper. It can be enjoyed with lashings of butter or golden syrup around a camp fire OR serve it with soup at a dinner party – in fact, it’s great any time you feel like your own easy homemade bread fix.
What is Damper?
You probably know damper as an iconic Australian bread that was baked by early settlers and continues to be popular today – especially when we're camping or enjoying the great outdoors.
But did you know damper actually has a much longer history in Australia?
A little history
Also known as bush bread or seed cake, Damper actually comes from a style of bread that Indigenous Australians have made for thousands of years. In Australia, millstones for grinding seeds into flour have been discovered – and they date back 50,000 years! Take a moment to let that number sink in!
Post-colonisation, damper was first mentioned in memoirs edited by Barron Field who was a Supreme Court Judge in NSW between 1817 and 1824.
Back then, the ingredients included flour, water and salt and the damper bread was cooked by being buried in the hot coals of a camp fire. The ashes were brushed off before eating.
Today, recipes generally rely on self raising flour and sometimes butter is rubbed into the flour. Milk is generally called for instead of water.
Ingredients notes
To make this iconic Australian bread, you need:
- self-raising flour (SR flour)
- salt
- milk.
Ingredient quantities can be found in the recipe card below.
TIP: If you only have plain (all purpose) flour, don’t fret. You can use this and add baking powder.
TIP: If you don't have milk, or enough milk, you can substitute with water. It will still be damper, just not quite as tasty in my opinion.
Equipment
You’ll also need:
- a large bowl
- a butter knife
- a baking tray (for home cooking) or camp oven/cast-iron pot/foil (for cooking on camp fire).
How to make Damper
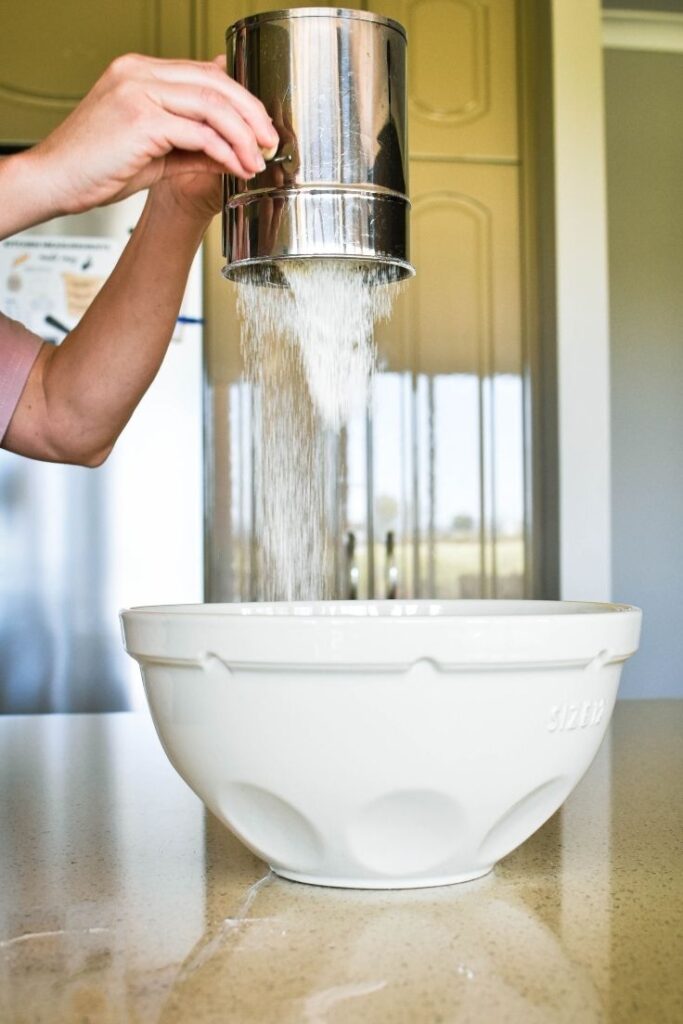
1. Sift flour and salt
First, sift your flour and salt into a large bowl.
Use a bit of height above the bowl to get the air incorporated. If you don’t have a sifter, simply whisk the flour in the bowl with a whisk or fork.
2. Warm and add milk
Next, warm the milk (without boiling) and add to the bowl. Mix with a butter knife until mixture sticks together.
TIP: If there are still dry crumbly bits in the bottom of the bowl add another 1-2 tablespoons of warm milk until mixture holds together. If mixture feels too sticky, add a little extra flour.
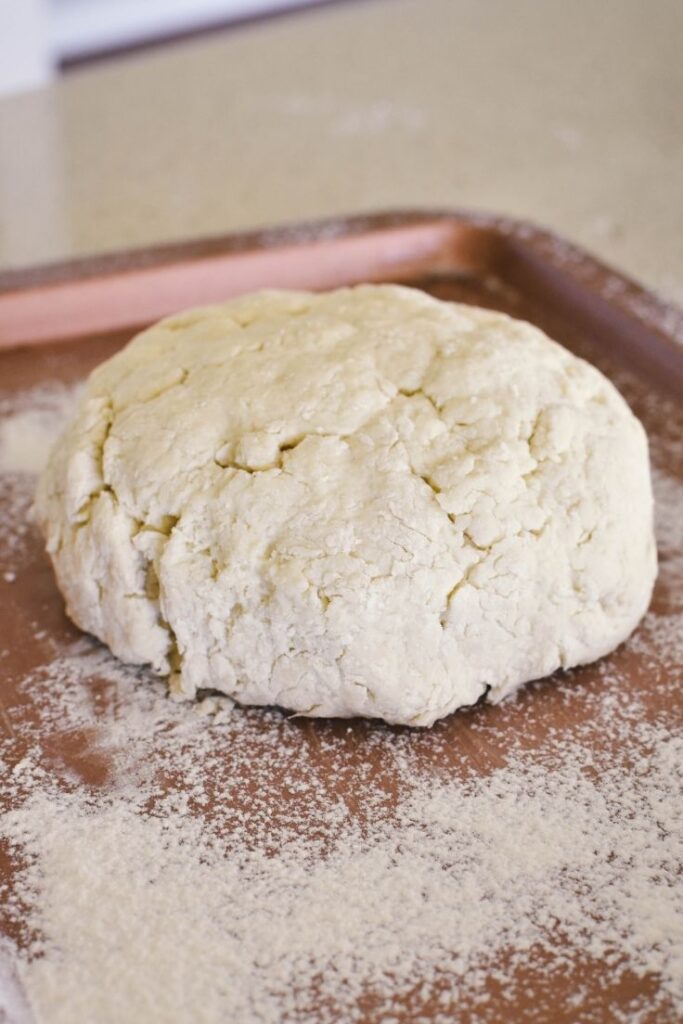
3. Knead dough gently into a round
Turn dough onto a floured surface and knead very gently into a round.
If you’re camping or don’t have an available surface, simply attempt this step in the big bowl you’re using.
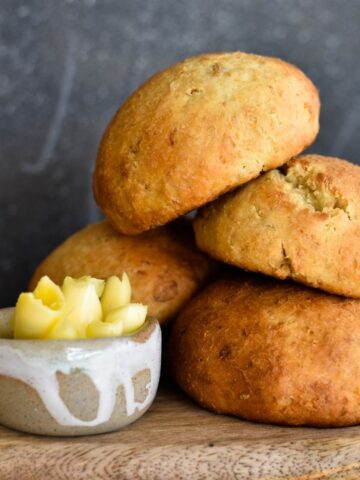
When cooking at home, place round onto a greased and floured baking tray and flatten gently so it’s about 13-14cm in diameter.
If you’re cooking this bush bread on an open fire, wrap damper in foil or place on a greased piece of foil in a camp oven. Again, you‘re aiming for a 13-14cm round.
4. Cook for about 25 minutes in oven or camp fire
If you’re cooking at home, pre-heat the oven to 200 degrees celsius / 390 degrees fahrenheit (fan-forced) and place damper on the bottom shelf. Bake for 25 minutes or until a rich golden colour.
If you’re cooking on a camp fire, cover damper with hot coals and bake for about the same time.
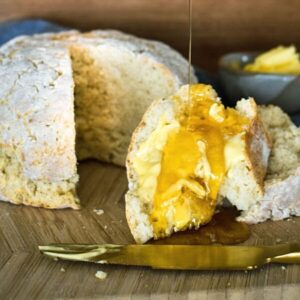
Remove from oven or fire and turn damper upside down on a wire rack to cool.
TIP: Check the damper is cooked properly by tapping on the base. It should sound hollow. If not, return to the oven for another 5 minutes.
Enjoying your Bread
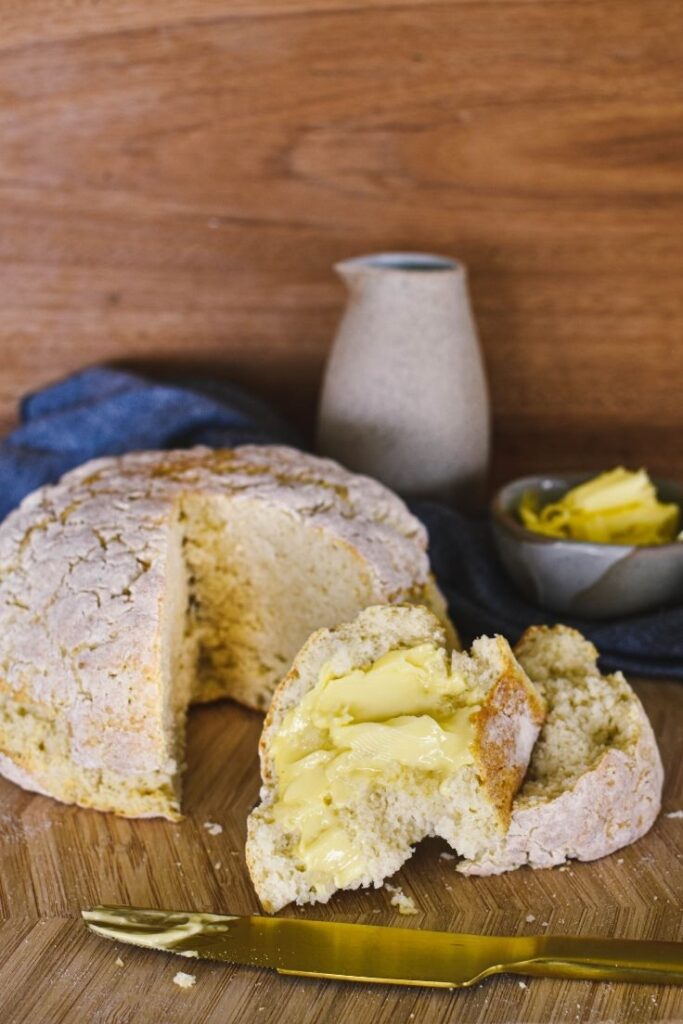
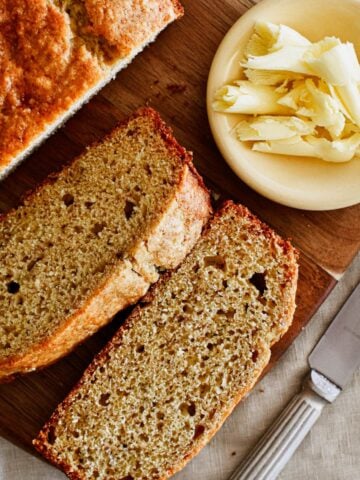
Serve your damper warm or allow to cool.
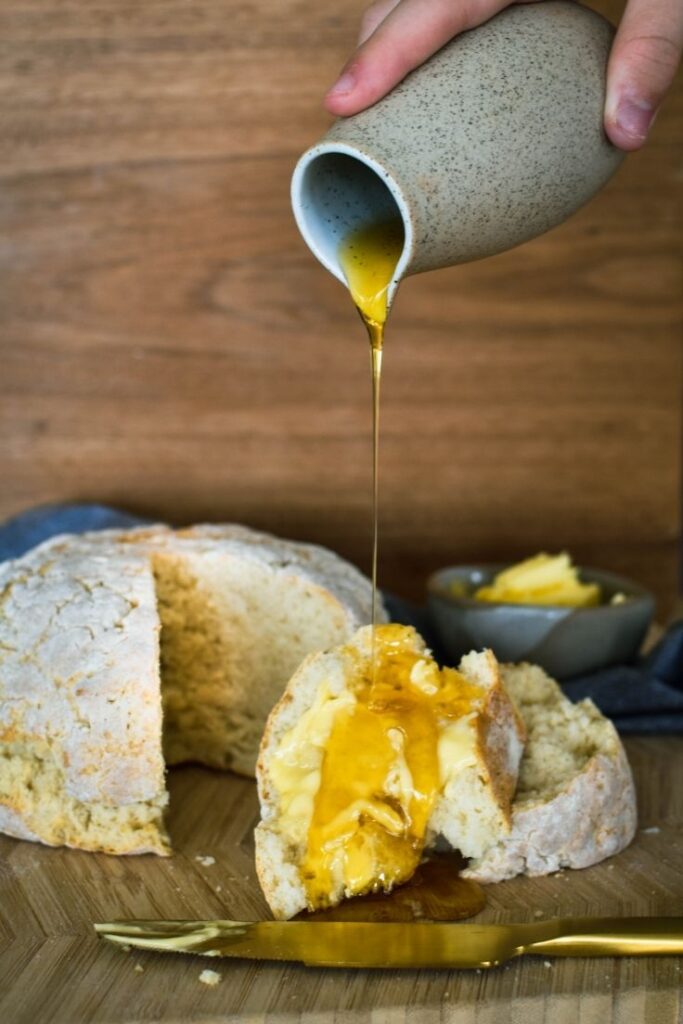
It’s traditionally eaten with butter or “Cocky’s Joy” (also known as Golden Syrup).
You can also enjoy it with your favourite jams, preserves or condiments.
Recipe FAQs
It's best eaten warm from the oven, but you can keep for up to 1-2 days. Store by wrapping in a clean tea towel.
Yes. Wrap in food wrap and freeze for up to 6 weeks.
I haven't tested the recipe with other flours, but i imagine it would work well with wholemeal flour, gluten free flour and a range of other flours.
Want more classic Aussie recipes?
Of course you do! Find them all here or jump straight to these favourites:


Made this recipe and love it? Please take a moment to rate the recipe and leave a comment below. It’s such a help to others who want to try the recipe. (And it really makes my day to hear how Nana Ling's recipes are being made, shared and loved all around the world! - Libby x)
For more fun and deliciousness in the kitchen, follow along on Facebook, TikTok and Pinterest, and subscribe for new posts via email.
Damper Recipe
Equipment
- large bowl
- butter knife
- baking tray
Ingredients
- 3 cups SR flour (or 3 cups plain/all purpose flour and 1 ½ tablespoons baking powder)
- 1 teaspoon salt
- 1 ¼ cups milk
Instructions
- Pre-heat oven to 200 degrees celsius (fan-forced).
- Sift flour and salt into a large bowl. (OR whisk with a fork if you don't have a sifter)
- Warm milk and then add to bowl. Mix with a butter knife until mixture sticks together. If there are still dry crumbly bits in the bottom of the bowl add another 1-2 tablespoons of warm milk until mixture holds together.
- Turn dough onto a floured surface and knead very gently into a round.
- Place round onto a greased and floured baking tray. Flatten gently until round is about 13-14cm in diameter.
- Bake on bottom shelf of oven for 25 minutes or until a rich golden colour.
- Remove from oven and turn damper upside down on a wire rack to cool.
- Check the damper is cooked properly by tapping on the base. It should sound hollow. If not, return to the oven for another 5 minutes.

Casey says
Even when flattened out before going into the oven the inside still comes out doughy. The outside is a beautiful golden brown colour and looks ready to come out.
Libby Hakim says
Hi Casey - not sure what is going wrong here, but the likely culprits are: you are over-kneading the dough or your oven is too hot. Do you think this could be the issue? Good luck!
mell says
Your information about the origin of damper. It was originally made by Aboriginal people using grains such as the wattle seed. It pre dates colononisation of this land. Please correct your information.
Libby Hakim says
Thanks for pointing this out. I did learn this recently and your comment has reminded me about the info in my post - it's now updated. I actually have some (complicated!) Aboriginal ancestry myself but was raised in the 70s and 80s when schools taught a very different version of Australian history compared to what my kids are now learning.
Sandra Grasby says
Easy to follow recipe and was delicious.
Libby Hakim says
Wonderful! Thanks for rating and reviewing, Sandra. Libby x