They may be old-fashioned, but who can resist Jam Drops?
No wonder they are still so popular on supermarket shelves and in suburban bakeries today.
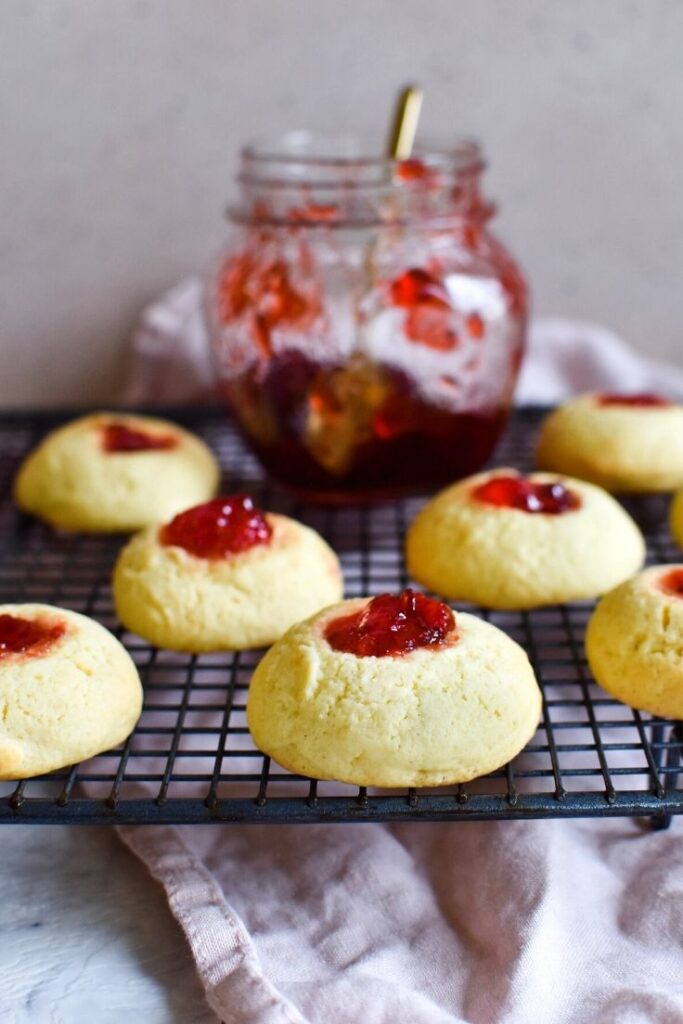
It's always tempting to take the easy road and buy some of your favourite biscuits.
But making your own own jam drops is worth the effort.
First, they'll ALWAYS taste even better than any store-bought version.
Second, you can make them just how you like them.
You can go sparse with the jam. Or if you prefer a little extra jam, go right ahead. (Though make sure you read the instructions below so your jam doesn't run during the baking process.)
If you prefer raspberry jam instead of strawberry jam, raspberry it is.
You could even make them extra special by making up a batch of Nana Ling's Super Simple Strawberry Jam and using your own jam in the recipe.
Isn't that the best thing about home cooking - making things to suit your liking?
Jump to:
The recipe
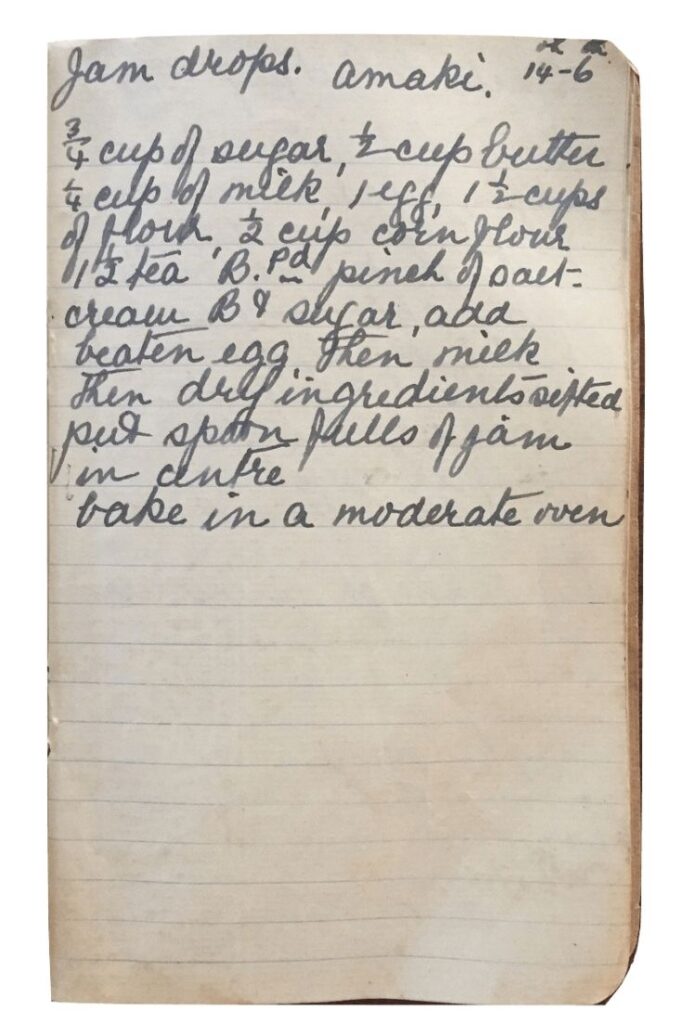
This recipe is one of Nana Ling's original handwritten recipes and these little Jam Drop biscuits are super simple to prepare and bake off.
As always, I've tested and tweaked the original recipe for modern times.
You'll see the old fashioned jam drops recipe below but keep scrolling right until the end to find the recipe card which includes a precise list of ingredients and instructions.
Ingredient notes
To make this recipe, you'll need:
- caster sugar
- butter
- milk
- egg
- plain flour (all purpose flour)
- cornflour (cornstarch)
- baking powder
- salt
- strawberry or raspberry jam.
Tips on using this old fashioned Jam Drops Recipe
It's the rounded shape and neat little drop of jam that makes these biscuits so adorable.
While it's a relatively simple recipe, there are a few things to keep in mind to make sure your biscuits come out of the oven looking just right.
Tip 1. Bring the butter and eggs to room temperature first
This will help the ingredients combine better and create a smoother biscuit mixture – which means a better textured biscuit.
Tip 2. Don't cut corners: chill the biscuit mixture
The recipe requires the mixture to be chilled for 10 minutes before rolling into balls. This will make it a lot easier to roll the mixture into balls.
You will also place the baking trays into the fridge for 30 minutes before baking. This helps the biscuits keep their lovely rounded shape.
Please, don't skip these steps!
Tip 3: Don't overfill with jam
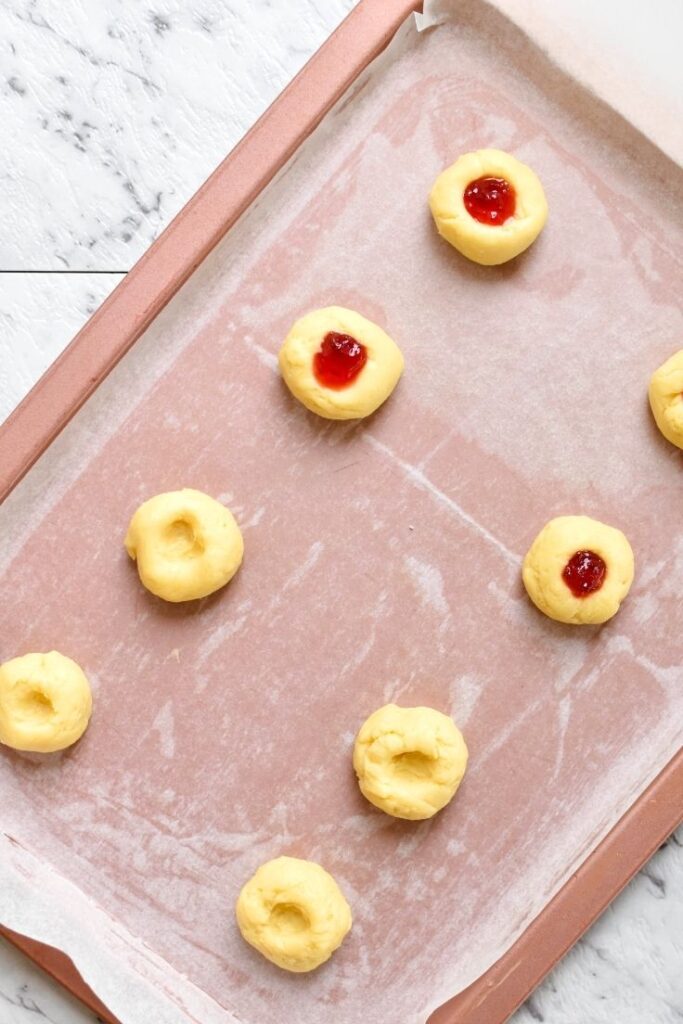
As you follow the recipe, you'll use your finger to make a small indent in the top of each ball.
If you prefer only a tiny amount of jam, use your pinkie to create a smaller indent. Use your thumb to create a larger indent if you prefer more jam.
Whatever size the indent, just be sure that you DO NOT go past the top of the indent when filling with jam. If you do, the jam may spill over and run during the baking process.
Enjoying your biscuits
Nana Ling's Jam drops can be enjoyed for up to one week if you store the biscuits in an airtight container.
If you love these old-fashioned biscuits, you might like these ones too:
- Spicy Fruit Roll Biscuits
- Cornflake Cookies
- Anzac Biscuits
- Iced Vovos
- Monte Carlos
- Butternut Cookies.

Jam Drops
Ingredients
- ¾ cup caster sugar
- 115 grams butter
- ¼ cup milk
- 1 egg
- 1 ¾ cups plain flour (all purpose flour)
- ½ cup cornflour (cornstarch)
- 1 ½ teaspoon baking powder
- pinch salt
- ¼ cup strawberry or raspberry jam
Instructions
- Pre-heat oven to moderate (170 degrees celsius, fan-forced).
- Cream butter and sugar.
- Slowly add whisked egg and milk. Beat mixture for a few minutes.
- Sift dry ingredients and add to mixture. Stir well to combine.
- Place mixture into fridge for 10 minutes.
- Roll into small balls, with a little less than a tablespoon of mixture in each ball. Place balls at least 5 cm apart on a baking tray lined with baking paper.
- Use your finger to make a small indent in the top of each ball. Make a smaller indent if you prefer less jam and a larger indent if you prefer more jam. Fill the indent with jam, but do not fill past the top of the indent (otherwise the jam may spill over and run during the baking process).
- Place baking trays in fridge for half an hour.
- Once chilled, place in the pre-heated oven and bake for 17 minutes or until a pale golden colour.
- Allow to cool for 10 minutes on baking tray and then transfer to a cooling rack.
Notes
Tips for better Jam Drops
- Bring the butter and eggs to room temperature first to help the ingredients combine better and create a smoother biscuit mixture – meaning a better textured biscuit.
- Chill mixture for 10 minutes before rolling into balls. This will make it a lot easier to roll the mixture into balls. Also place the baking trays into the fridge for 30 minutes before baking to help drops keep their shape during baking.
- Don't overfill with jam. You want the jam to be contained in the indent rather than bubbling up, overflowing and running down the sides of the biscuits.

Mezza
Hi . Can the dough be refrigerated for later use or frozen?
Libby
Hi. You should be able to refrigerate for a few days and freeze for a few months (thawing first) before baking off. Happy cooking!
Mezza
Thanks so much. Made a batch today , just lessened the sugar...they sure are a hit!😉
H
What is a moderate oven? Why not just say the number Fahrenheit?
Libby
Hi. A moderate oven is 180°C = 350-375°F = Gas Mark 4-5. If I said the number in Fahrenheit most of my readers who are located in Australia would have to convert it to celsius 🙂
Kim
I love the story behind your blog. Plus I love jam drops too as they remind me of growing up in the 80's.
Libby
Hi Kim. Thanks for stopping by and commenting. The 80s were a terrific time to be growing up!
Cheryl
How do you stop the jam from bleeding or leaking, please
Libby
Hi Cheryl. Make sure there are no cracks in the dough when you form the balls. Keep them in your hands a little longer to get that smoothness if necessary. When you flatten the balls slightly, you can also press your thumb into the centre slightly to make a little dip that will make sure the jam is contained, too. I hope that helps! Libby 🙂