
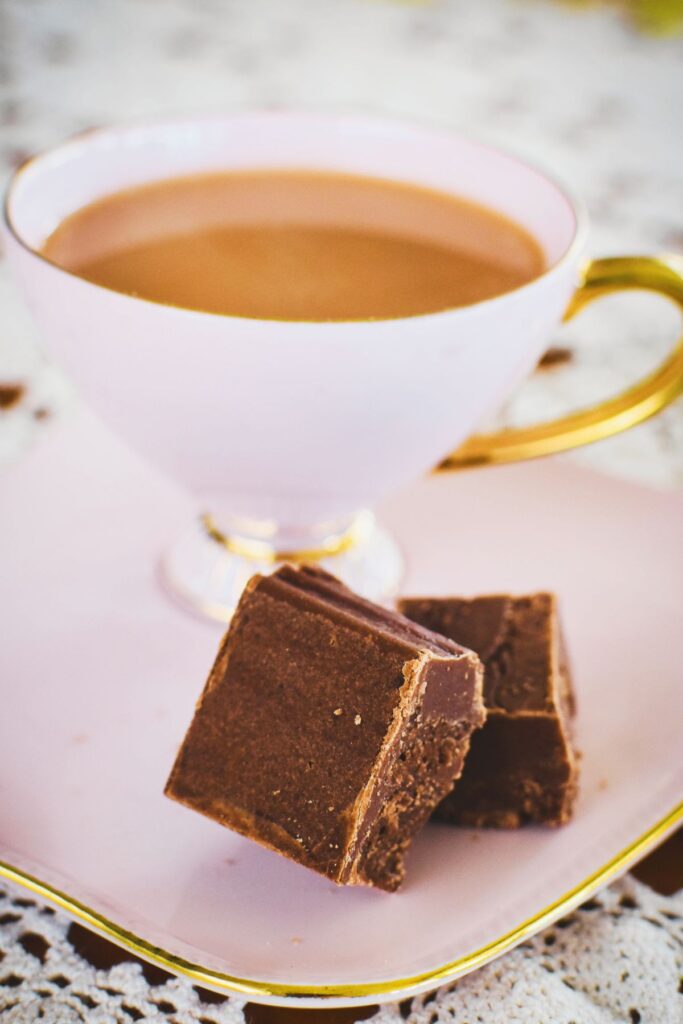
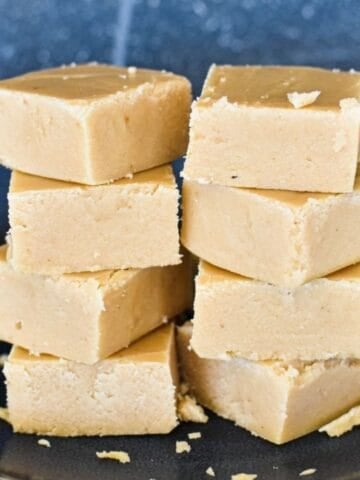
This (extremely more-ish) Chocolate Fudge is made the old-fashioned way with milk and sugar rather than condensed milk. If it's an easier condensed milk fudge you're after, check out my Baileys Fudge Recipe.
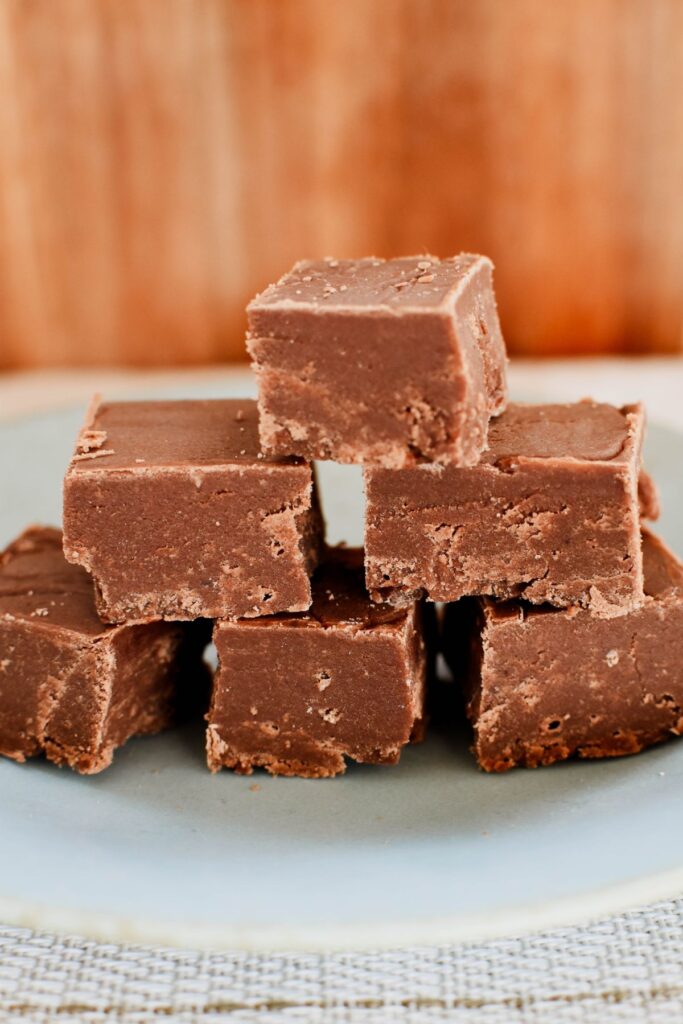
With step-by-step instructions, troubleshooting and tips included below, this Chocolate Fudge Recipe contains everything you need to up your sweet-making skills and create a rich, velvety chocolate treat that'll have people raving.
Jump to:
A little history
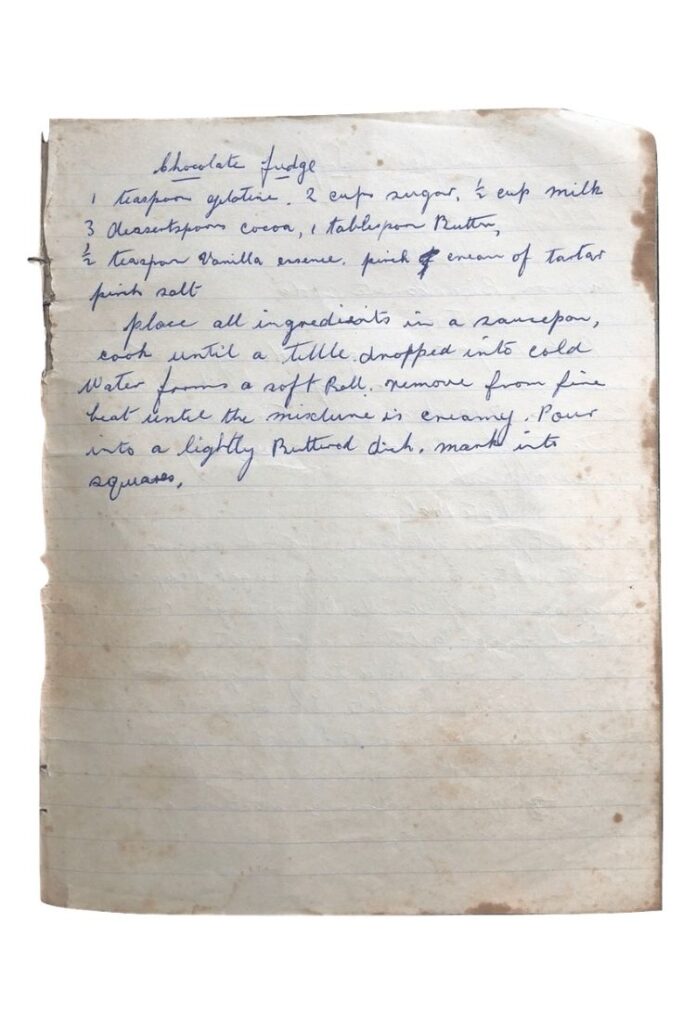
This recipe comes directly from the pages of my Nan Mac's handwritten recipe book.
Nan Mac was my maternal grandmother and Nana Ling's daughter. Nan Mac was home-schooled by Nana Ling, and she followed Nana Ling's tradition of keeping a notebook filled with handwritten recipes.
It's the type of recipe where you throw everything into the one saucepan and off you go.
But you do have to get the technique right, so keep reading this post rather than just relying on my nan's handwritten notes below to make sure you end up with smooth and creamy blocks of fudge.
Ingredient notes
As I mentioned above, this isn't one of the more modern recipes that calls for condensed milk.
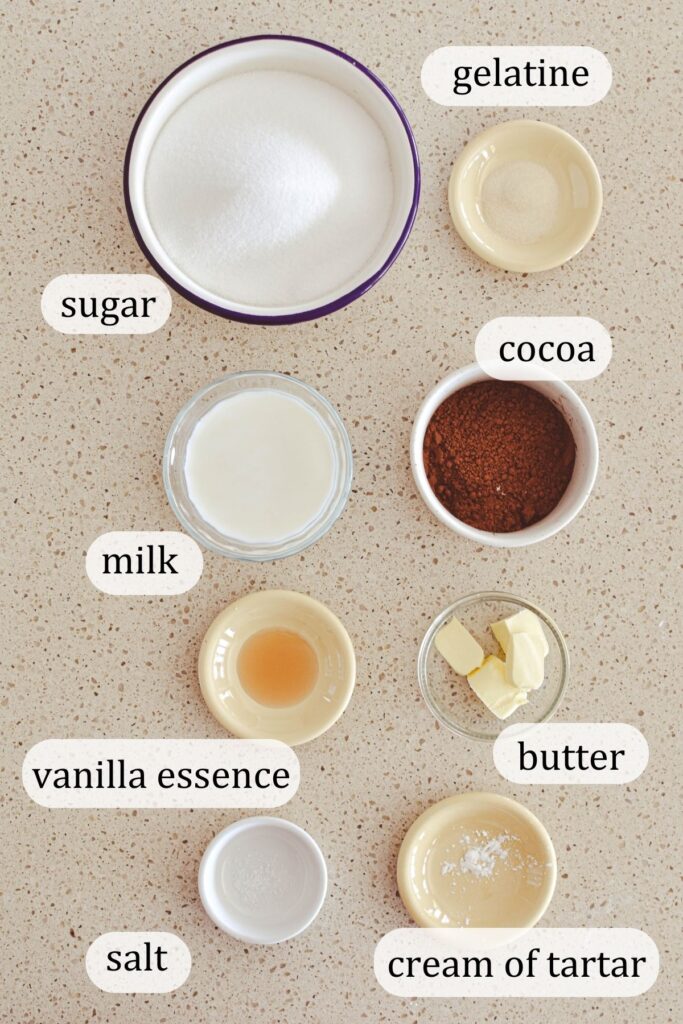
Instead, you'll need:
- gelatine (in powder form, available at supermarkets in the baking section)
- sugar (caster sugar is preferred)
- milk
- cocoa
- butter
- vanilla essence
- cream of tartar
- salt.
The ingredient quantities can be found in the recipe card at the end of this post.
How to make Chocolate Fudge the old-fashioned way
Before we start, here are my top three tips for fudge-making:
- Read through all of this section before making the fudge.
- Don't rush the process. Slow and steady – especially when bringing the mixture to a simmer – wins the fudge-making race.
- When beating the fudge, go old school with a wooden spoon. DO NOT take the easy way out with a stand mixer or electric beater. It's the old school Nana way of beating with a wooden spoon that makes the creamiest fudge and helps avoid the risk of overbeating (which leaves you with a sugary mess).
Okay, let's make chocolate fudge!
Prepping
You'll need s small dish or tin for the fudge, a bar tin or slightly smaller.
Lightly grease with butter.
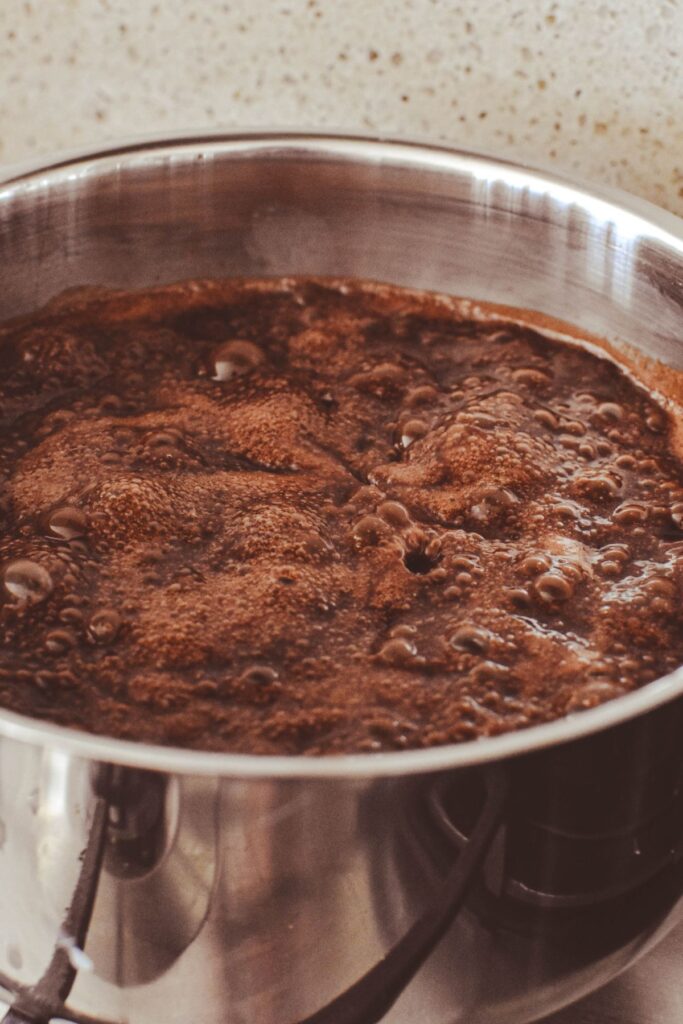
Cooking
Place all the ingredients in a large saucepan.
Stir the mixture over low heat, stirring gently to ensure the sugar dissolves.
Once the mixture is smooth and the sugar has dissolved, bring to a simmer and let simmer for 10 minutes.
You will only need very low heat to maintain a simmer.
DO NOT STIR during this cooking time. If there are sugar crystals on the side of the saucepan, use a heatproof brush dipped in a little milk to brush away sugar crystals.
Cooling and beating
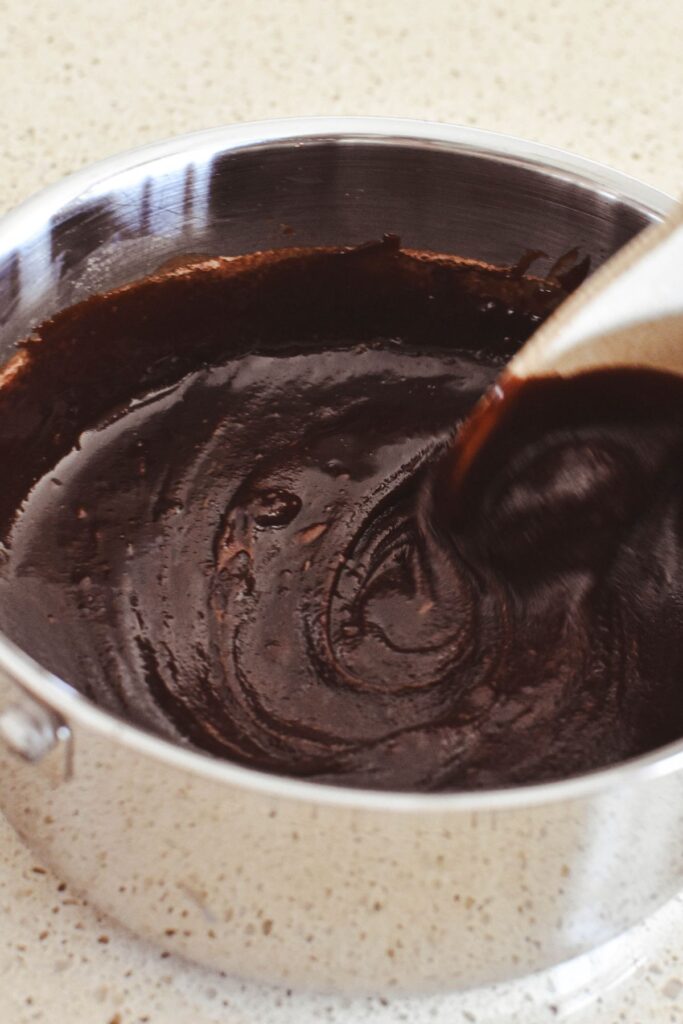
Take the chocolate fudge mixture off the heat and allow to cool in the saucepan for 15 minutes.
Next, beat the mixture using a wooden spoon until mixture starts to lose its glossiness and becomes thicker and more creamy in texture. This should take less than 2 minutes.
The moment between beating too little (and mixture being too runny) and beating too much (and mixture becoming stiff and sugary) is fast.
Keep your eye on it and don't be tempted to overbeat once it's reached a creamy consistency which can still be poured.
TROUBLESHOOTING TIP: If you do overbeat and the mixture becomes crumbly and unable to be poured, don't panic. Rescue it by putting it back over low heat and gently stirring until it reaches a creamy and pourable consistency. Then keep going with the next step below.
Setting
Pour fudge mixture into a small, lightly buttered dish.
Mark into squares and cut with a sharp knife once set.
More tips for smooth fudge-y success
Remember:
- Stir gently while bringing the mixture to a simmer and then DO NOT STIR AGAIN. Put down the wooden spoon.
- Using a heat-proof pastry brush and a little milk, brush any sugar from the sides of the saucepan. Sugar crystals are your enemy when making fudge.
- Remember: don't cheat by using an electric mixer. There's a very short timeframe between not beating enough and beating too much, so the wooden spoon gives you a lot more control here. Plus it's a good arm workout.
Follow these tips and you'll be enjoying a square of old-fashioned Chocolate Fudge with a cuppa in no time!
Recipe FAQs
Store in a cool, dry place at room temperature. Do NOT store in the fridge as it will cause your fudge to become dry.
Stored in accordance with the above conditions, it will last up to a few weeks.
Yes! Nan Mac was best known in the family for her Mock Chicken, wonderful Sponges and Gramma Pie. I've also tested her handwritten recipes for Chocolate Eclairs and Mock Cream.
More old-fashioned sweets
If you're interested in more sweet treats made the old-fashioned way, check out these recipes:

Made this recipe and love it? Please take a moment to rate the recipe and leave a comment below. It’s such a help to others who want to try the recipe. (And it really makes my day to hear how Nana Ling's recipes are being made, shared and loved all around the world! - Libby x)
For more fun and deliciousness in the kitchen, follow along on Facebook, TikTok and Pinterest, and subscribe for new posts via email.
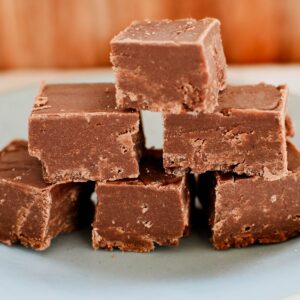
Chocolate Fudge
Ingredients
- 1 teaspoon gelatine
- 2 cups sugar
- ½ cup milk
- 2 tablespoons cocoa
- 1 tablespoon butter (20 grams)
- ½ teaspoon vanilla essence
- pinch cream of tartar
- pinch salt
Instructions
- Place all ingredients in a large saucepan.
- Stir mixture over low heat, stirring gently to ensure sugar dissolves.
- Bring to a simmer and let simmer for 10 minutes. DO NOT STIR during this cooking time. If there are sugar crystals on the side of the saucepan, use a heatproof brush dipped in a little milk to brush away sugar crystals.
- Take off the heat and allow to cool for 15 minutes.
- Beat using a wooden spoon until mixture starts to lose its glossiness and becomes thicker and more creamy in texture. This should take less than 2 minutes. The moment between beating too little (and mixture being too runny) and beating too much (and mixture becoming stiff and sugary) is fast. Keep your eye on it and don't be tempted to overbeat once it's reached a creamy consistency which can still be poured.
- Pour into a small, lightly buttered dish.
- Mark into squares and cut with a sharp knife once set.
Notes
- Stir gently while bringing the mixture to a simmer and then DO NOT STIR AGAIN. Put down the wooden spoon.
- Using a heat-proof pastry brush and a little milk, brush any sugar from the sides of the saucepan. Sugar crystals are your enemy when making fudge.
- Remember: don't cheat by using an electric mixer. There's a very short timeframe between not beating enough and beating too much, so the wooden spoon gives you a lot more control here. Plus it's a good arm workout.


Noeleen says
This is the recipe for old fashioned fudge that I’ve been searching for for years. Thanks also for your detailed instructions and tips.
Libby Hakim says
Yay! You're very welcome - pleased you've found in here in the Cooking with Nana Ling collection 🙂
Jessica says
What size dish are you using for this?